SPECTRALEN
Well-Known Member
- Joined
- Jun 26, 2008
- Messages
- 385
- Reaction score
- 154


How do you like the electric brakes? Do you have any part numbers for the kit you bought?
Thanks...
I still need to plug in the brake controller under the dash of my Avalanche. I kind of want to wait till the interior, motor, and the jet are on to give me some weight back there.
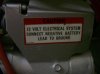
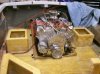
As far as parts, I switched to a coupler instead of the actuator, also a Pivithitch swing away tongue, and the brake kit from ebay. You need brake hub/drums that are smooth on the inside, yours might be that way, mine were not so the kit I bought needed to have those. And I needed a different size rear axle seal than the one that came with the kit.
Here's some of the links:
http://www.ufpnet.com/Portals/0/PDFs/Couplers.PDF
http://www.extremetrailers.com/options/pivit-hitch.html
http://www.ebay.com/itm/Trailer-5-o..._Camper_Parts_Accessories&hash=item23294e6f02
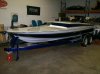
Lenny the boat look great, trailer look great, can't wait to see the upholstry done. We are pretty close to the same colors, is that a GM blue? Mine is off a Chevy Cruz color, a little different base to the blue make it a tad darker.
") Pearl is a lot more $.
Pearl is a lot more $.


Dude, you need to take some blue paint to the "Berkeley" lettering on the jet. I seen some do it and it really sets it off.
Are those rope seals a general kit or a specific part for the Berkeley?
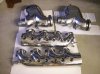
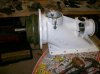
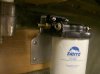
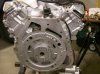
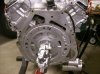
Spectralen, wouldn't use the Berkeley packing glands because of the metal braiding. If overtightened just a bit it can score the pump shaft by cutting water flow lubricating it. I only use the white teflon glands that doesn't score. it's available from American Turbine. Also, I would cut off the reducer on the Harman exhaust manifold to upgrade to larger hoses and tips. As in post of resuscitation of 24 Spectra by 'queenmerry'
I have used the white ones before and these actually feel very slippery. I don't believe there's any type of metal in them and they were in the kit that I bought from Jet Boat Performance.
How about put in a splitter on each side and have 4 small tips?
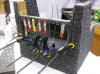
I have a lot of parts laying around taking up a whole lot of space in my garage. It'll be nice to put them where they belong.


How long are your gas tanks and how much do they hold? Coming along very nicely im jealous youll be on the water soon!!

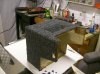

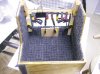

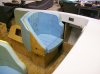
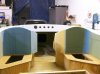
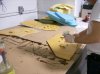
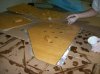
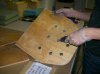
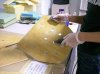
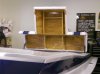
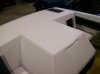
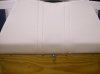
 I know they look a little wrinkled but they're not stapled in place yet.:eek


And they look good too! I wonder if you can trace the number on the Harman tag andI masked and saved all the factory decals.


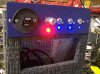
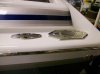
Those navigation lights in the bowrail are badass !!!
Get it.. Location is simple, you can see them up front and on the sides. You have boats out there mounting their nav. lights all over the place.