WELCOME TO RIVER DAVES PLACE

95 Nordic

justfloatn

Well-Known Member
Joined
Jan 18, 2008
Messages
104
Reaction score
0
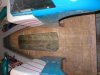
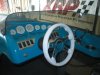
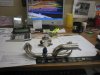
I'm posting this little updating project, on my 95 Nordic Sprint, on this site because it seems to be where most of the do-it-yourself type hangout. The boat is in great shape for a 95, but the interior is starting to show it's age. I am changing the carpet, fixing the seat mounts and removing the carpet from the engine and storage areas. I also have a few ideas on a hidden bimini and some polished stainless panels for the switches.

Here is the start.
 

Attachments

  • My desk 003.jpg
    My desk 003.jpg
    58.9 KB · Views: 938
  • My desk 004.jpg
    My desk 004.jpg
    60 KB · Views: 1,082

justfloatn

Well-Known Member
Joined
Jan 18, 2008
Messages
104
Reaction score
0
Here is the removal of the carpet and floor. You can see where the seat has been rotated/moved several times. I thought the wood was rotted but it is not. After talking with a couple of people it seems the wood screw into the floor is a problem for new boats as well. I am going to build a aluminum plate to try and solve this.
 

Attachments

  • My desk 022.jpg
    My desk 022.jpg
    70 KB · Views: 944
  • My desk 023.jpg
    My desk 023.jpg
    73.7 KB · Views: 921

justfloatn

Well-Known Member
Joined
Jan 18, 2008
Messages
104
Reaction score
0
Here are the aluminum plates I made to mount under the floor. I know aluminum is not very strong for holding a thread but the screws are 1/4-20 and the 3/8" aluminum is twice the thickness of a 1/4-20 nut, so as long as I don't over-torque the base and use a light duty thread lock it should hold. I could only grab five of the six holes due to the stringers blocking the sixth hole. Also the carpet and muck removal is completed and ready to reassemble. I am not putting carpet back in the storage areas or engine area. The carpet in the front storage area still felt damp after three months inside with the door proped open. I am going to gel coat or color epoxy them. I also am looking at sealing the floor with a two-part epoxy bottom paint. Has anyone ever done this? Will it work or is there something better? If scuffed will the carpet glue stick to this?
 

Attachments

  • 08_1-29 007.jpg
    08_1-29 007.jpg
    69.2 KB · Views: 916
  • 08_1-29 006.jpg
    08_1-29 006.jpg
    71 KB · Views: 948
  • 08_1-29 003.jpg
    08_1-29 003.jpg
    62.9 KB · Views: 938
  • 08_1-29 001.jpg
    08_1-29 001.jpg
    85.8 KB · Views: 935

HavasuSelect

I Told You RD Doesn't Sux
Joined
Nov 19, 2007
Messages
127
Reaction score
1
Looks like a great project! Keep up the good work.
 

RiverDave

In it to win it
Joined
Sep 13, 2007
Messages
123,360
Reaction score
151,125
Great Idea on the aluminum plate on the bottom side of the floor. You will have no problems with 1/4 - 20 screws into a 3/8 th's plate. Far better then what was going on there before. How did you mount the plate to the wood before through bolting the seat base? (I'm curious so that if you ever remove the seat base you can just screw back into the plate without having to remove the whole floor again?

We had a 98 Sprint and I was just getting ready to go through the guages and switches etc.. but we ended up selling it and going a different direction. I'm pretty sure the switch plates that they are currently mounted to are cast aluminum? (Don't quote me on that) In any event, I'm almost possitive they are metal, so if that's the case you should be able to just remove the switches, polish / clear coat the plates, and reinstall the switches again. If you want the writing on the swithces there's all sorts of options there.. Having them painted / vinyl, laser etched, machined etc..


As far as the front storage.. Good question? I'm not sure what the best option would be there? How are you getting that much water in there? (I don't remember ever having that problem? We didn't ski much though or the like)

The 2 problems I did have with the boat is getting in from the engine hatch and having the back seat unfold, thus making me fall on my ass. We put velcro strips back there to help it, but I saw something on my Dad's Schiada that would make a better option then my velcro. They screw down these plastic "pucks" and then put large holes in the seats.. The puck prevents the seat from moving in any direction but up kinda deal.

Do you have problems with the side panels of your boat always coming loose? Mine were coming loose all the time, wood screws stripping etc.. Was a major pain in the ass.

Looking forward to seeing more progress pics!
RD
 

justfloatn

Well-Known Member
Joined
Jan 18, 2008
Messages
104
Reaction score
0
Great Idea on the aluminum plate on the bottom side of the floor. You will have no problems with 1/4 - 20 screws into a 3/8 th's plate. Far better then what was going on there before. How did you mount the plate to the wood before through bolting the seat base? (I'm curious so that if you ever remove the seat base you can just screw back into the plate without having to remove the whole floor again?

We had a 98 Sprint and I was just getting ready to go through the guages and switches etc.. but we ended up selling it and going a different direction. I'm pretty sure the switch plates that they are currently mounted to are cast aluminum? (Don't quote me on that) In any event, I'm almost possitive they are metal, so if that's the case you should be able to just remove the switches, polish / clear coat the plates, and reinstall the switches again. If you want the writing on the swithces there's all sorts of options there.. Having them painted / vinyl, laser etched, machined etc..


As far as the front storage.. Good question? I'm not sure what the best option would be there? How are you getting that much water in there? (I don't remember ever having that problem? We didn't ski much though or the like)

The 2 problems I did have with the boat is getting in from the engine hatch and having the back seat unfold, thus making me fall on my ass. We put velcro strips back there to help it, but I saw something on my Dad's Schiada that would make a better option then my velcro. They screw down these plastic "pucks" and then put large holes in the seats.. The puck prevents the seat from moving in any direction but up kinda deal.

Do you have problems with the side panels of your boat always coming loose? Mine were coming loose all the time, wood screws stripping etc.. Was a major pain in the ass.

Looking forward to seeing more progress pics!
RD

For the aluminum plate I have a larger center bolt to hold it permanently in place. You can see it in the picture.

The water source was found when the carpet was removed. Looks like a rock found its way through the hull when I beached it. Very small hole 1/16". Obviously a larger scar on the outside. So add that to the fix list.

The back seat was a problem on this one too. The first time I took the boat out the bottom cushion blew out at around 50MPH. I fixed that with an aluminum and plastic hook and lock latch system. I'll take some pics.

Side panels have not been a problem. But the #6 screws to hold the floor in were all either broken or bent. I think the floor was just floating in the boat. So I have 1/4" X 2" stainless wood screws I ordered from Fastenal to replace them. I hope doubling the size will be large enough.

I have been thinking of taking the side tanks out, loosing the middle storage area and installing a belly tank to balance the boat better. I just don’t know if the result is going to be worth the $400 to $500.

I need to look at the gages closer, I hope you’re right. That would be a lot easier.

I also started on the hidden bimini. I'll get some pics and post tomorrow.
:D
 

RiverDave

In it to win it
Joined
Sep 13, 2007
Messages
123,360
Reaction score
151,125
Looking forward to seeing them! I have a pretty good idea how your going to do the hidden Bimini.. On mine there wasn't alot of room (point in fact there was no room) between the motor and the back seat.. I'm kinda curious as to how your going to get past that.

What motor is in this boat?

RD
 

sandeggo

Well-Known Member
Joined
Jan 15, 2008
Messages
106
Reaction score
2
looks like its coming right along, if you lose the side tanks and switch to a belly tank, then you can store skis and some other stuff where the tanks were.
 

justfloatn

Well-Known Member
Joined
Jan 18, 2008
Messages
104
Reaction score
0
Ok I didn't get much time last weekend to work on the boat. And with the cold temperatures the epoxy floor coating took about 30hrs to cure Vs. 12hrs. It is not garage floor epoxy. I added gel coat pigment to make it match the carpet. Once I get everything back together I will make a decision on carpeting the storage areas. I need to fiberglass the middle section back in to finish the epoxy this weekend. I will screw the floor down after the epoxy is finished incase I need to remove the floor again. God I hope not.

08_1-29014.jpg


I took some pictures of the hidden bimini. It's going to be difficult to show what my finished vision is until the interior is put back. I plan to have the bimini lower behind the rear seat and under the engine hatch, so when not in use it won't be in the way laying on the engine hatch.
I had to notch the side of the hull. I have a little more trimming to do. This part of the hull is normally hidden by the side panels and seat. I had to move the bimini mount back, and just by luck the rear screw was far enough back. So I only needed to drill one hole and only have to patch one hole. I pulled the upholstery back on the side panels, trimmed the wood, pulled the upholstery back and stapled & glued it back. I need to finish the rear seat and engine side panels.
08_1-29012.jpg

08_1-29013.jpg

08_1-29011.jpg
 

justfloatn

Well-Known Member
Joined
Jan 18, 2008
Messages
104
Reaction score
0
Here is the latch I made last summer. I notched some box aluminum to make a wide hook at the back of the seat. It hooks under the seat base.
Then I made a plastic/p-tex (sp?) hook that latches under a alumiunum brace at the front of the seat base. The cushion acts as the detent pressure. So when you push the seat in place it compresses the seat back cushion slightly and once down it snaps in place. To lift the seat you put pressure with your knee on the front of the seat pushing it back and pulling up with your hand to release it. It is a little tough to release, but I'll take that over falling on my ass or fishing my seat out of the lake again.:D

08_1-29008.jpg

08_1-29009.jpg
 

RiverDave

In it to win it
Joined
Sep 13, 2007
Messages
123,360
Reaction score
151,125
Very Clever! Was your seat double hinged on the front before? Or did it just pull out?

Mine was double hinged on the front and would blow open when hauling ass. When you'd get in from the engine hatch it'd "open" underneath your feet causing you to pretty much fall flat on your face as well.

RD
 

justfloatn

Well-Known Member
Joined
Jan 18, 2008
Messages
104
Reaction score
0
Very Clever! Was your seat double hinged on the front before? Or did it just pull out?

Mine was double hinged on the front and would blow open when hauling ass. When you'd get in from the engine hatch it'd "open" underneath your feet causing you to pretty much fall flat on your face as well.

RD

No hinge it just had some Velcro. The seat would flip right off if you stepped on the front edge. It's hard to believe how half ass boats have been built even into the late 90's. I'm looking forward to owning a full composite boat in the next few years. But 'till then.
 

justfloatn

Well-Known Member
Joined
Jan 18, 2008
Messages
104
Reaction score
0
Last weekend I fiber glassed the floor back in and epoxy coated the entire floor. Should be rot proof...famous last words right :D. While waiting for things to dry I got a wild hair and polished the seat bases. The original brushed swirl pattern was not very custom looking. Removing the material was a job. I started with a 3M Scotch type disc on an angle grinder for the large material. Then moved to 600grit. I did the first one by hand; SUCKED! The second one I broke out the D.A. with some left over 600grit wet dry I had. it worked like a champ. The aluminum polishes real easy after 600 grit. I saw Nordic is still using the same seat bases but polished, so I copied them. I think it will look better. :beer
 

Attachments

  • Boat 6-6-07 003.jpg
    Boat 6-6-07 003.jpg
    68.5 KB · Views: 619
  • Boat 6-6-07 002.jpg
    Boat 6-6-07 002.jpg
    64.9 KB · Views: 630
  • Boat 6-6-07 005.jpg
    Boat 6-6-07 005.jpg
    64.1 KB · Views: 652
  • Boat 6-6-07 004.jpg
    Boat 6-6-07 004.jpg
    63.9 KB · Views: 654

RiverDave

In it to win it
Joined
Sep 13, 2007
Messages
123,360
Reaction score
151,125
I was just going to ask if there was any updates! Looking good!! I hope the guy that bought my old boat is reading this thread. Lots of good insight in here.

RD
 

justfloatn

Well-Known Member
Joined
Jan 18, 2008
Messages
104
Reaction score
0
Well now that I'm down to the dash details progress has slowed. I burnt out my buffer on Sat morning. The wires got too hot internally and the ground wire shielding melted off shorting the wire to the windings. So it's a goner. I polished a couple small pieces by hand. Thanks for the heads up on the switch panels Dave they are aluminum.:beer You mentioned lazer etching the labels onto it. Where and how mutch do you think that would cost? I would like to know; whose idea was it to liquid-nail the switches in to the housing? :swear Four broke apart trying to disassemble the mess. :mad: I also stripped the throttle assembly to polish it. I can’t swing a $600.00 livorsi. So I'm going to make this one look as good as possible. Hopefully I'll have some progress during the week and be able to get everything wrapped up this weekend. I would like to get the carpet in by March 8th. I'll get some pics when I have more done.:D
 

RiverDave

In it to win it
Joined
Sep 13, 2007
Messages
123,360
Reaction score
151,125
Well now that I'm down to the dash details progress has slowed. I burnt out my buffer on Sat morning. The wires got too hot internally and the ground wire shielding melted off shorting the wire to the windings. So it's a goner.

Buy a good bench grinder (big one) not one of those cheezy small deals.. Worth their weight in gold.

I polished a couple small pieces by hand.

How in the "F" did you do that?

Thanks for the heads up on the switch panels Dave they are aluminum.:beer
No worries, I scratched one of mine on accident is how I found out they were metal.
You mentioned lazer etching the labels onto it. Where and how mutch do you think that would cost?

Not much.. Maybe 50 bucks? Call Dana Marine, I'd bet they can help, or maybe Mike from Rexmarine can help. There's a place in Orange County called "Dunham" that does alot of the annodizing / powdercoating for Dana, Eddie, Rex etc.. and they do it.

I would like to know; whose idea was it to liquid-nail the switches in to the housing? :swear Four broke apart trying to disassemble the mess. :mad:

Well the upside is, Nordic will most likely send you new switches for free if you call them and ask nicely.. If not they shouldn't cost more then a couple bucks a switch..

I also stripped the throttle assembly to polish it. I can’t swing a $600.00 livorsi. So I'm going to make this one look as good as possible. Hopefully I'll have some progress during the week and be able to get everything wrapped up this weekend. I would like to get the carpet in by March 8th. I'll get some pics when I have more done.:D

Livorsi is ok... I'd check this one out as well.

http://ww.danamarineproducts.com/Pr...6&productid=4747&CFID=382735&CFTOKEN=51021830

There's some really nice shifters out there, you might be able to find one on e-bay or the like for cheap?

RD
 

justfloatn

Well-Known Member
Joined
Jan 18, 2008
Messages
104
Reaction score
0
Buy a good bench grinder (big one) not one of those cheezy small deals.. Worth their weight in gold.

You make it sound like I had a cheezy buffer.:D It was a good one the problem is it was 10yrs (or more) old. I was looking at a 3HP 10" grinder to replace it, but the RPM is 1700 Vs. 3400RPM for the smaller 3/4HP to 1HP models. Dont you need the RPM to polish?


I polished a couple small pieces by hand
How in the "F" did you do that?

I have some polishing cloth I purchased a few years back at the boat drags. It's like a cross between paper/cloth(feels almost like money) and very fine emory cloth. As long as the metal is smooth you can use this with mothers or any liquid buffing compound and it's works realy well. It takes longer than a wheel but it works for small pieces.
 

justfloatn

Well-Known Member
Joined
Jan 18, 2008
Messages
104
Reaction score
0
Well between the wife and daughter getting sick I haven't had a lot of time to work on the boat. I did get the throttle/shifter project done and the bulk of the carpet in.
I started with some plate aluminum and made a switch housing. I want to add the trim to the throttle like the newer ones.
boat011.jpg

Here is the finished switch mount
boat013.jpg

I made some aluminum covers to replace the plastic ones. I had to hand file the bevel on the back so it would set flush.
boat014.jpg

I stripped the black paint off, sanded the metal smooth and polished the stainless throttle and shift levers. This is a befor and after shot of the metal.
boat017.jpg

Here is the finished throttle assembly. I made a stainless cover for the plastic base. I have some sheet stainless I cut out and hand hammered the edges to wrap around. I know it's not as cool as a new one.But it only cost me about $20.00 and four to six hours of time.Plus I realy enjoy doing this kind of stuff. Keeps my artistic side happy.:D The switches are ground switches. I still need to finish the harness with the relays and mount it. I will get more pics when done.
boat024.jpg

boat026.jpg


Here is the interior. The bulk of the carpet is in. I need to finish trimming it out and put the locker covers together. This carpet is the closest I could find to match the original grey. Long story..But Nordic is using a different manufacturer now and the original manufacturer will only sell a full roll. I have no need for 100' of carpet.
boat021.jpg


I almost forgot. Here is a pic of the screws that were holding the floor in. As you can see most were broken or streched. The one to the far left is what I replaced all of them with. They are about 3X larger. I hope they hold.
P2130024.jpg
 

SJP

WHTBRD
Joined
Sep 25, 2007
Messages
5,911
Reaction score
7,680
I am going to have to copy you on the seat base for my captains chair. Any details you leaving out on the second one you did in an automated fashion. :cool:

the resto you are doing is bitchin
 

justfloatn

Well-Known Member
Joined
Jan 18, 2008
Messages
104
Reaction score
0
I am going to have to copy you on the seat base for my captains chair. Any details you leaving out on the second one you did in an automated fashion. :cool:

the resto you are doing is bitchin

Not really. I started with a small air angle grinder with a scotch brite pad to remove the heavy material and get it somewhat smooth.
Then took my DA with wet dry 600 and sanded wet. It took about three sheets and was a little shiny when done.
Then hit it with a buffer and the aluminum compound.
Finaly a little hand polishing with mothers.

And Thanks. It's cheaper than new and they build the same boat except the addition of a step in the hull.:beer So why not. Next winter I'll tackle the Gel Coat.
 

RiverDave

In it to win it
Joined
Sep 13, 2007
Messages
123,360
Reaction score
151,125
Nordic added a step in the 22? I know the 21 Blaze has a step, but I thought the 22 is still the same boat?

Interesting on the buttons on the throttle? I'm wondering when it's instaled does that peace of aluminum slip into the throttle? Or does it stick out the side of it like it currently does?

RD
 

justfloatn

Well-Known Member
Joined
Jan 18, 2008
Messages
104
Reaction score
0
Nordic added a step in the 22? I know the 21 Blaze has a step, but I thought the 22 is still the same boat?

Interesting on the buttons on the throttle? I'm wondering when it's instaled does that peace of aluminum slip into the throttle? Or does it stick out the side of it like it currently does?

RD

It must be the same boat. I thought I read it had a single step in an article or on their web site. But I went back and looked at photos, No step.

The throttle is a copy of the Mercury style with the bright red switch holder sticking out. The side has to stick out for clearance. The depth of the switches and the wiring connections is pretty tight. Yea I know it's not as cool as the $600.00 plus jobs. But I'm past that. I can do a lot more with $600.00 that will make the boat nicer than a polished throttle assembly. All new gauges for example.:D
 

justfloatn

Well-Known Member
Joined
Jan 18, 2008
Messages
104
Reaction score
0
:DI finally have some progress to show. I have been spending a lot of time cleaning and detailing while it's apart. Most of the areas will never be seen, but I just couldn't put it back together dirty. I should have the interior 100% complete by this weekend. I need to if I want to go on the Easter run Saturday.:D
Here is the dash. The first two are a before and after. I still need to add the labels. I just decided to go with a clear background black letter label that can be removed in the future. I was going to install the new Nordic switches with the labels on them. But I have called them twice and talked to the parts guy. I'm still waiting on him to have time to look them up and give me a price. I will still install the new style switches down the road. The steering wheel was a gift from the wife. I was shocked that it was not drilled for countersunk screws, so I fixed it :D

The third pic is the side panel installed with the notch for the hidden bimini top. I disassembled the panel, cut the wood, trimmed the vinyl and re stapled. OOOH, AAAAAH.. Nothing special. I need to get some edge molding for the fiberglass.

The fourth pic is my eBay score that just showed up this AM and I'm pumped...$114.00 with shipping :beer :D.
 

Attachments

  • boat 2 004.jpg
    boat 2 004.jpg
    70.3 KB · Views: 500
  • boat 2 005.jpg
    boat 2 005.jpg
    51.6 KB · Views: 524
  • boat 2.jpg
    boat 2.jpg
    70.9 KB · Views: 516
  • My desk 006.jpg
    My desk 006.jpg
    65.7 KB · Views: 491

justfloatn

Well-Known Member
Joined
Jan 18, 2008
Messages
104
Reaction score
0
The bulk of the carpet is finished. I ended up polishing the storage frames. The paint was chipped badly. So after I stripped it I figured what the heck. I cleared them after polishing. Hopefuly it will last a couple seasons. I need to complete the storage areas and the hidden bimini. The oil filter is in the way. I need to relocate the oil filter so the bimini will drop down and fit. It is about a 1/2" too high and the cover won't close completely.

BEFORE
attachment.php


AFTER
Easter020.jpg
 

Cole Trickle

Member
Joined
Sep 25, 2007
Messages
23,509
Reaction score
15,930
Boat looks great.... I wish we would get some decent weekend weather so I can get my jet cleaned up. (won't fit in the garage:swear)
 

RiverDave

In it to win it
Joined
Sep 13, 2007
Messages
123,360
Reaction score
151,125
I really like the way this deal is turning out. That hidden bimini is straight Genius!

RD
 

justfloatn

Well-Known Member
Joined
Jan 18, 2008
Messages
104
Reaction score
0
Boat looks great.... I wish we would get some decent weekend weather so I can get my jet cleaned up. (won't fit in the garage:swear)

Thanks. :D I have taken a break the last couple weeks. I need to get back on it this weekend. What kind of jet do you have? Part of me still wants to build a 19' Daytona or a CP. I love the instant acceleration of a jet.

I really like the way this deal is turning out. That hidden bimini is straight Genius!

RD

Wow, Thanks. I'm in a holding pattern on finishing the bimini. I spent a little too much on this and I filled the tanks for a trip to the river a couple weeks ago :eek: Damn! The gas cost as much as the carpet! So I am waiting a few weeks to buy the oil filter parts to finish. It's still too cold in NorCal for boating to be a priority anyway.;) :D
 

lebel409

Well-Known Member
Joined
Oct 4, 2007
Messages
3,099
Reaction score
584
We can tell it's cold by your avatar :D

Nice work on your boat!
 

justfloatn

Well-Known Member
Joined
Jan 18, 2008
Messages
104
Reaction score
0
I have been busy and lazy lately. I still need to finish the engine area carpet. I got the bimini complete but need to take some picks under the engine cover. It drops down right about where the t-stat housing is. Here is a pic I took a couple weeks ago that that shows it in the storage position. :skull :drool :D I think it came out great.
 

Attachments

  • Boat 4-5-08 002web.jpg
    Boat 4-5-08 002web.jpg
    67 KB · Views: 451

RiverDave

In it to win it
Joined
Sep 13, 2007
Messages
123,360
Reaction score
151,125
Those look GREAT!!

Bimini looks good too.. :D

RD
 
Top