WELCOME TO RIVER DAVES PLACE

Putting A 72 Campbell back together

wettrthebettr

Well-Known Member
Joined
Sep 14, 2018
Messages
1,043
Reaction score
839
Well That was a nice winter, Not much has been done to the Big yellow bus, LOL
It's all sealed up till after my surgery next week
I should be able to open her up in may.
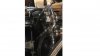
I do have some goodies to install, I got a Turbo 400, 454 Bravo eng, And a new Bennett 531z motor kit for the tabs.
I haven't decided if I was going to polish the 400 or just paint it, It has a reverse valve body and the pump drive

polish.jpg
 
Last edited:

cofooter

Well-Known Member
Joined
Apr 30, 2012
Messages
5,641
Reaction score
9,133
It would look bitchen polished, but man, what a job...………..
 

wettrthebettr

Well-Known Member
Joined
Sep 14, 2018
Messages
1,043
Reaction score
839
I can't see spending all that time polishing the 400 that will below deck.
It would look cool all polished,
the reality is This restoration needs to be completed before all the fancy shit.
I just rubbed out all the ruff stuff and made it nice and smooth.
 

wzuber

Well-Known Member
Joined
Jan 7, 2009
Messages
6,715
Reaction score
9,230
I can't see spending all that time polishing the 400 that will below deck.
It would look cool all polished,
the reality is This restoration needs to be completed before all the fancy shit.
I just rubbed out all the ruff stuff and made it nice and smooth.
clean it, paint it gloss black and put chrome pan. brackets, linkage etc. on it. Looks clean, sharp and done.
 

wettrthebettr

Well-Known Member
Joined
Sep 14, 2018
Messages
1,043
Reaction score
839
I'm gona pant it semi Black with Matalic Gold for the pan to match Eng pan
I have some Chome Paint my brother had but never used pintura mexicana

How can all the nuk and crannies get polished?
Some of the areas ar so small I can't get my small finger in there.
 

Maestro

Well-Known Member
Joined
May 27, 2008
Messages
1,288
Reaction score
509
Polish and clear coat it, you'll have time on your hand, cut out all the casting and deburr sharp edges.
 

wettrthebettr

Well-Known Member
Joined
Sep 14, 2018
Messages
1,043
Reaction score
839
Ya got that right Brian, I have lots of time till about June-July,
then I need to "put this Campbell Back Together" LOL
I've already cut out sharp edges,
I have some paint remover for the areas i can't get to.
A little here a little there, Bam it will be done.
 

wettrthebettr

Well-Known Member
Joined
Sep 14, 2018
Messages
1,043
Reaction score
839
Well The Good Old Campbell is getting back together a little slower now.
Gathering goodies for the Engine so it can be started.
 

wettrthebettr

Well-Known Member
Joined
Sep 14, 2018
Messages
1,043
Reaction score
839
Now to remove all the interior to finish hooking up the two below deck tanks, so I can drop in the engine to set up alignment, to setup mounts.
the engine dog house might have to be raised or maybe eliminate it all together.
campbellf.jpg
 

wzuber

Well-Known Member
Joined
Jan 7, 2009
Messages
6,715
Reaction score
9,230
Now to remove all the interior to finish hooking up the two below deck tanks, so I can drop in the engine to set up alignment, to setup mounts.
the engine dog house might have to be raised or maybe eliminate it all together.
View attachment 751149
i Like the period correct look of the interior of that boat. could you get away with altering the top section to allow a taller motor?
 

wettrthebettr

Well-Known Member
Joined
Sep 14, 2018
Messages
1,043
Reaction score
839
Yeah Warren, I will know better how the 454 will fit when I get the rear motor plate.
i'm pretty sure All I'll have to do is just re frame the base of the engine cover and keep the top.
the boat has a very deep hull with those 4 12 X 4 stringers
I liked the way this Campbell looks and it's set up is what drew me to it.
The bench seat mounted to the gunwale keeps it solid.
 
Last edited:

wettrthebettr

Well-Known Member
Joined
Sep 14, 2018
Messages
1,043
Reaction score
839
Almost dropped the Engine and Tranny in today, but we had surprise with rain this morning and all day.
maybe next week.
454.jpg
454b.jpg
454c.jpg
454a.jpg
 

wettrthebettr

Well-Known Member
Joined
Sep 14, 2018
Messages
1,043
Reaction score
839
Does anybody know why there is two inlet hose connectors on the glenwood magnaflow water pump?
My Aqua Craft only had one

454c.jpg
 
Last edited:

74 spectra20 v-drive

74 spectra20 v-drive
Joined
Nov 27, 2008
Messages
2,045
Reaction score
2,894
That is just a T that someone installed. You can put any fitting you want there, I run a 45 on my Flatbottom to hide the line and a 90 on my day cruiser to pick up the line coming out of the sea strainer. I use a tap to get my fittings where I need them, a half turn here and there makes a difference and I don’t have a bunch of Teflon tape all over the place. I am plumbing a friends Sanger right now and went with a 90 to tuck the line behind the alternator. These pumps pull a ton of water and I have seen no issues with volume. For a drive way fitting I have an AN MALE TO HOSE BIB fitting, I have an old garden hose about 8’ long that I hook to the pump and stick in a bucket that is being filled with water. I like this as I can see the pump pull water.
 

Attachments

  • Slide1.JPG
    Slide1.JPG
    132.1 KB · Views: 240
  • Slide1.JPG
    Slide1.JPG
    91.6 KB · Views: 230
  • IMG_0306 (002).PNG
    IMG_0306 (002).PNG
    784.3 KB · Views: 233
Last edited:

wettrthebettr

Well-Known Member
Joined
Sep 14, 2018
Messages
1,043
Reaction score
839
Yea, The Bucket works great, I have used that Method for a while.
You can see how good your pump is working, and when ya rev it up ya can watch the bucket water level go to the bottom.
This method shows how Fake a lake system can burn up your pump and engine, when reving it up too long
 

wettrthebettr

Well-Known Member
Joined
Sep 14, 2018
Messages
1,043
Reaction score
839
I have a question, I am about ready to install my engine and turbo 400.
My engine hoist will not hold the 454 and t400 steady.
The hoist is rated 2 tons, I need it to reach out the full length, which is 1/2 ton 1,000lbs.
I would like to ask , for alignment purposes would it be better to install the t400 first, then the engine?
seven days later:
ask a dumb question gets O replies, Thanks
 
Last edited:

wettrthebettr

Well-Known Member
Joined
Sep 14, 2018
Messages
1,043
Reaction score
839
OK, Got it: with tape measure in hand use it to square in engine, mount it, then mount t400, done deal
Now if the rain would stop
 

wettrthebettr

Well-Known Member
Joined
Sep 14, 2018
Messages
1,043
Reaction score
839
WELL it's still raining up here, So I've been working on the engine
I was going to buy a Alternator Bracket, With the rain and thunder storm over head, I said f----it I'm going to make one.
I have no Mill, NO fancy equipment,So I have make do with hand tools, and small power tools it's funner this way, LOL
So I dug up a sheet of T8 1/4" alum stock and went to the drawing board.
Took measurements applied to cardboard and traced the template to the Alum sheet.
Tried the jig, but to slow, The Sawzall worked great
The slot for alt adjuster was a little trickier, scribe a line parallel to arch, drill a series of holes, then sawzall it up.
lots of filing, half round files and round files, flat files came in handy finish work, buffed it up, sanded it, polished it the poor man's way
With the drill clamped to the bench, LOL ha ha ha, just to start I finished with the drill in the Vise.
I made TWO BRACKETS upper one and a lower one I am not sure which one I am to use, i think the lower one.
Tomorrow IT will be finshed and hooked up for final photos
alta.jpg
alt1.jpg
alt2.jpg
alt3.jpg
alt4.jpg
alt5.jpg
 
Last edited:

wettrthebettr

Well-Known Member
Joined
Sep 14, 2018
Messages
1,043
Reaction score
839
The Alternator Brackets are done, First choice was the lower one, but after installing the upper one , I chose the upper bracket.
Look at the Flag in the left bracket, I didn't plan the flag to show up, That just Happen on it's own.
Rained out again the hoist is lined up for engine to drop in, if no downpours.
alt6.jpg
alt7.jpg
alt8.jpg
enginetranny.jpg
 

wettrthebettr

Well-Known Member
Joined
Sep 14, 2018
Messages
1,043
Reaction score
839
It would of been great day out on the water
Fuel Tank is secure and hooked up.
 

Attachments

  • fuel tank hook up 1.jpg
    fuel tank hook up 1.jpg
    92.8 KB · Views: 245
  • fuel tank hook up.jpg
    fuel tank hook up.jpg
    87.1 KB · Views: 222
  • fuel tank hook up 3.jpg
    fuel tank hook up 3.jpg
    79.3 KB · Views: 242
  • fuel tank hook up 2.jpg
    fuel tank hook up 2.jpg
    77.6 KB · Views: 236

lenmann

Well-Known Member
Joined
Apr 13, 2013
Messages
1,604
Reaction score
3,152
Looking good! It's incredible how much work these deals are, sure helps to have some skills.
 

wettrthebettr

Well-Known Member
Joined
Sep 14, 2018
Messages
1,043
Reaction score
839
Time to get WIRED!!
There are four groups of wires,
first group #10 yellow under the dash it goes to switch and the other end I think goes to the Alternator, green #12 ground, red#12 hot
Second group red#10 solenoid-starter, yellow#12 start, white#12 ?
Third group all coil wires, brown,blue, coil black Ground all #12
Forth group 2 red # 12 Fuel tanks, red and black #12 lights
these are for starboard side, That will be pulled into 3/4 pvc pipe mounted on stringers and Bulk head
The Port side just has one group, Bennett HYD controls, fuel tank and a power sorce red and black #12 for ? bilge pump
these will get pulled into 3/4 PVC pipe mounted on stringers and Bulk head
wire.jpg
wire1.jpg
 
Last edited:

wettrthebettr

Well-Known Member
Joined
Sep 14, 2018
Messages
1,043
Reaction score
839
The wiring Is done Till engine gets dropped in for fine tuning
The starboard side did not get mounted yet
Nine wires in each side of 3/4 PVC, That's with two extra Circuits for spares
The buss bar is under the dash and all looks well.
wire2.jpg
wire4.jpg
wire3.jpg
 

wettrthebettr

Well-Known Member
Joined
Sep 14, 2018
Messages
1,043
Reaction score
839
Picked up a Foam BBC mock engine to set up engine plate mounts.
Not a bad Deal, the mock foam BBC cost 25 bucks for a week.
I only needed it for one day.
It sure beats setting up the complete BBC with one person.
The alternator was very close to the stringer, but it will work with 1 1/8" clearance.
I did have a few thoughts while setting her up.
How far off can the engine be aligning it to the V-drive,
I set it the same angle and height as the V-drive input flange.
I wanted to drop the rear of the engine 1" but it would not line up to V-drive.
I figured the U-joints could handle the difference, but I set it 1/4'" down in the rear,
its pretty close to the V-drive angle 1 degree drop
Any body have any input on this?
foam block.jpg
foam block 1.jpg
 
Last edited:

wzuber

Well-Known Member
Joined
Jan 7, 2009
Messages
6,715
Reaction score
9,230
Picked up a Foam BBC mock engine to set up engine plate mounts.
Not a bad Deal, the mock foam BBC cost 25 bucks for a week.
I only needed it for one day.
It sure beats setting up the complete BBC with one person.
The alternator was very close to the stringer, but it will work with 1 1/8" clearance.
I did have a few thoughts while setting her up.
How far off can the engine be aligning it to the V-drive,
I set it the same angle and height as the V-drive output flange.
I wanted to drop the rear of the engine 1" but it would not line up to V-drive.
I figured the U-joints could handle the difference, but I set it 1/4'" down in the rear,
its pretty close to the V-drive angle 1 degree drop
Any body have any input on this?
View attachment 764165 View attachment 764166
Ideally you want the centerline of v-drive input shaft and the C.L. of the eng. Crank shaft to be a straight line as if you could pull a string line thru their respective centers. For conversation sake Lets call that angle 10 degrees in relation to the keel of the boat or up 10 degrees from the keel. To get the correct pre load on the u- joint to keep the needles rotating u need 1-2 degrees in the joint so not much. Maintaining that 10 degree angle in the crank shaft you can raise or lower the motor in the hull an 1/8", 1/4" etc. But need to keep the 2 shafts in phase to ea. Other to minimize harmonics in the drive line and keep the two shafts rotating in phase. Are their main caps with that mock block?
Additional side note. In your 1st. photo the rt. Side angle block need to be trimmed to the radius of the notch i cut in the plate to insure it clears the starter.
 
Last edited:

wzuber

Well-Known Member
Joined
Jan 7, 2009
Messages
6,715
Reaction score
9,230
Picked up a Foam BBC mock engine to set up engine plate mounts.
Not a bad Deal, the mock foam BBC cost 25 bucks for a week.
I only needed it for one day.
It sure beats setting up the complete BBC with one person.
The alternator was very close to the stringer, but it will work with 1 1/8" clearance.
I did have a few thoughts while setting her up.
How far off can the engine be aligning it to the V-drive,
I set it the same angle and height as the V-drive output flange.
I wanted to drop the rear of the engine 1" but it would not line up to V-drive.
I figured the U-joints could handle the difference, but I set it 1/4'" down in the rear,
its pretty close to the V-drive angle 1 degree drop
Any body have any input on this?
View attachment 764165 View attachment 764166
Idaeally you want the centerline of v-drive input shaft and the C.L. of the eng. Crank shaft to be a straight line as if you could pull a string line thru their respective centers. For conversation sake Lets call that angle 10 degrees in relation to the keel of the boat or up 10 degrees from the keel. To get the correct pre load on the u- joint to keep the needles rotating u need 1-2 degrees in the joint so not much. Maintaining that 10 degree angle in the crank shaft you can raise or lower the motor in the hull an 1/8", 1/4" etc. But need to keep the 2 shafts in phase to ea. Other to minimize harmonics in the drive line and keep the two shafts rotating in phase. Are their main caps with that mock block?
Additional side note. In your 1st. photo the rt. Side angle attaching block needs to be trimmed to the radius of the notch i cut in the plate to insure it clears the starter.
 

wettrthebettr

Well-Known Member
Joined
Sep 14, 2018
Messages
1,043
Reaction score
839
The Mock Foam BBC does not have the main caps, it does have the threaded inserts for them
The Vee drive input shaft center is to a straight line to center of Engine crank
I had to lower the rear of the engine to a 2 degree to match the vee Drive input flange.
The Angle mounts and plate is trimed, all is polished ready to install.
Next week the the engine T400, drive shaft gets installed
Can't do it this week end The kids are coming over for fathers day
 
Last edited:

wettrthebettr

Well-Known Member
Joined
Sep 14, 2018
Messages
1,043
Reaction score
839
Saturday is The day for the engine to be installed.
I have to replace one of the remote oil filter fittings, and get longer hoses for new location upper middle transom
I sawed 4" holes for new Exhaust tips, need to drill the three mounting bolt holes.
Working on the drive shaft, and shaft guard mount.
That's about it, That stainless steel braided water lines are expensive.
I have a question for anybody that cruises the Sacramento Delta water ways.
The Stainless steel hose shop told me if the Coast Guard pulls me over for an inspection they will red tag my boat for Stainless steel water hoses, cause they are not Coast Guard approved for boats.
wire5.jpg
 

wettrthebettr

Well-Known Member
Joined
Sep 14, 2018
Messages
1,043
Reaction score
839
The day finally came, The engine, T400, drive shaft is all installed.
All went well, the T400 was 1/2" off on measurements for rear mount.
Do this T400's get hard mounted like the the engine?
Or do they use the rubber mounts like a truck?
The T400 will not let me have the flat floor like I thought it would.
I knew the floor would be raised towards the engine but This will be above the floor all the way to the rear seats.
So that will get dealt with later.
engine in.jpg
engine in 1.jpg
engine in 2.jpg
engine in 3.jpg
engine in 4.jpg
engine in 5.jpg
engine in 6.jpg
 

wettrthebettr

Well-Known Member
Joined
Sep 14, 2018
Messages
1,043
Reaction score
839
Most of all the rigging is done.
I picked up a Battery / Bennett tray to hold them behind the port rear seat.
The MSD box went behind the starboard rear seat, second Battery to share that spot also.
Elactrical is all done, engine canks over, and all works.
Exhaust hose just came, last thing to go in so I can test everything without it getting in the way.
It is amazing that with three tape measures, three ratchets, two flashlights, Some how they always sprout wings and fly a way.
If I ever do this again it will be a flatty.
done3.jpg
done2.jpg
done1.jpg
done.jpg
done4.jpg
 

HydroSkreamin

StressEliminator
Joined
Jan 12, 2014
Messages
2,106
Reaction score
5,659
It is amazing that with three tape measures, three ratchets, two flashlights, Some how they always sprout wings and fly a way.

Don’t forget black markers, rolls of tape and razor blades! Where do they go? Maybe the same black hole the socks in the wash end up:D

Looking good!
 

wettrthebettr

Well-Known Member
Joined
Sep 14, 2018
Messages
1,043
Reaction score
839
Getting closer to putting the Campbell back together.
Everything is fitting quite nicely, A few little glitches here and there
I really wanted a flat floor oh well it;s only gona be 16" x 26" x 4.5"
The shifter cover was a Challenge, Didn't know what to do with the corners with the foam there was nothing to attach to.
Waiting for Exhaust "S" Bend,Stainless steel 4.5" drop
The Dog house had to be rebuilt to fit the new Engine height
Not much Floor space, I'm thinking of laying teak wood down
Should be ready for a test run in one -two weeks, then I can do the final touch up.
doghouse1.jpg
doghouse3.jpg
doghouse2.jpg
doghouse.jpg
doghouse4.jpg
doghouse5.jpg
 

wettrthebettr

Well-Known Member
Joined
Sep 14, 2018
Messages
1,043
Reaction score
839
had a little set back yesterday eve, I was doing the last of the trouble shooting the bennett trim system for leaks for about an hour and a half with the switch on And my MSD Blaster 2 Ignition Coil blew up, good thing I was not near it, What a mess hot oil every where
Here is what the in sides look like, LOL
First time i have seen the insides.
I was going to start her up today but I'll have to wait for amazon prime two day delivery.
coil.jpg
coil1.jpg
 

Roaddogg 4040

Well-Known Member
Joined
Dec 1, 2007
Messages
2,619
Reaction score
435
had a little set back yesterday eve, I was doing the last of the trouble shooting the bennett trim system for leaks for about an hour and a half with the switch on And my MSD Blaster 2 Ignition Coil blew up, good thing I was not near it, What a mess hot oil every where
Here is what the in sides look like, LOL
First time i have seen the insides.
I was going to start her up today but I'll have to wait for amazon prime two day delivery.
View attachment 773754 View attachment 773755

I’m no electrical guru but I’ve never seen
a coil blow up like that. Do you know if it is
a wiring issue, part issue etc ? Sucks to have the setback, especially on first start up day. Good luck and the boat is coming along great

Steve
 

wettrthebettr

Well-Known Member
Joined
Sep 14, 2018
Messages
1,043
Reaction score
839
Steve, I have never seen or heard of a coil blowing up either, so I called MSD and asked them about it.
They told Me they get calls all the time about people leaving the key on to long and causing there coil to blow up.
I have the complete MSD Ignition set up, and was hooked up exactly to the MSD diagram.
It Happens
 

Roaddogg 4040

Well-Known Member
Joined
Dec 1, 2007
Messages
2,619
Reaction score
435
Steve, I have never seen or heard of a coil blowing up either, so I called MSD and asked them about it.
They told Me they get calls all the time about people leaving the key on to long and causing there coil to blow up.
I have the complete MSD Ignition set up, and was hooked up exactly to the MSD diagram.
It Happens

Good to know that you didn’t do anything wrong! You will love it when you get er done...

Steve
 

wettrthebettr

Well-Known Member
Joined
Sep 14, 2018
Messages
1,043
Reaction score
839
She's pulled outside for first start-up.
I installed a RED light in the dash to lite up when ignition switch is on. LOL
The new coil should come tomorrow and the fuel station around the corner.
The front seats were a tight fit, They should be it's all new wood.
OOps, almost forgot i'm waiting for Eddie Marine Exhaust "S" Bend pipes
I ordered them from Summit racing for the lower cost and free shipping, but they get shipped out from Eddie's Marine, weird set up but it save's me money.
pullout.jpg
pullout1.jpg
pullout2.jpg
pullout3.jpg
 
Last edited:

wettrthebettr

Well-Known Member
Joined
Sep 14, 2018
Messages
1,043
Reaction score
839
Well it's getting close to a year for this project, My plan is to take her for a cruise on my birthday July 30.
Make some bilge covers for the center, V-drive, Drive shaft, T400, and the engine.
Exhaust S pipe should be delivered tomorrow To complete so I can start her up.

doghouse1.jpg

20190716_183033.jpg
 

Attachments

  • 20190716_181530.jpg
    20190716_181530.jpg
    358.2 KB · Views: 461
  • 20190716_182442 (1).jpg
    20190716_182442 (1).jpg
    292.9 KB · Views: 485
Last edited:

wzuber

Well-Known Member
Joined
Jan 7, 2009
Messages
6,715
Reaction score
9,230
Well it's getting close to a year for this project, My plan is to take her for a cruise on my birthday July 30.
Make some bilge covers for the center, V-drive, Drive shaft, T400, and the engine.
The engine cover had to be raided 1 1/4" and set back 1 1/4", so the engine cover top had to be modified tot the modified frame, all because of that darn Exhaust riser.
I did my best to keep the stock set up, I'm not an upholstery repair man, LOL
Exhaust S pipe should be delivered tomorrow To complete so I can start her up.

View attachment 776399

View attachment 776394 View attachment 776395 View attachment 776396

That 1-1/2" gap is just extra ventilation for the fuel vapor in the bilge area, just run with it. haha
It's lookin good. Will you be on pins n needles tomorrow until after you fire it and every thing is ok?
Before firing....Remember your check list and walk through it system by system and component by component. Check all your fuel system connections to insurer their correct, tight etc. Batteries fully charged on charger, oil level, in neutral, prop removed, fire extinguishers sitting aside for quick and easy access, oil system primed and pres. reading on gauge, belts tight, all mounts tight etc. etc. Never hurts to be extra cautious on the fire up. Good luck and don't forget the video of it running.
 

wettrthebettr

Well-Known Member
Joined
Sep 14, 2018
Messages
1,043
Reaction score
839
Yeah Warren, there is a lot to double checking, I think the worst will be I got the distributor 180 off
After she runs, and no more modifications i'm putting Foam Faux Teak Marine Mat on the floor
I haven't decided what to put on the engine cover frame, I don't think the teak mat would look good.
There is a small lake 5 miles from the house I'll go for it's first cruise with no covers in place.
 

wettrthebettr

Well-Known Member
Joined
Sep 14, 2018
Messages
1,043
Reaction score
839
Thanks brokeboatin, I won't have any money left to put fuel in those two 25 gallon tanks. LOL
i just got done sealing all the Covers today.
The first run will be without the center covers: (V-drive, drive shaft, t400, and engine)
I need to see all that on it's maiden voyage.
After everything is working the way it should and no leaks,
Then all the covers can be installed and the Teak floor and rug can be installed.
covers.jpg
covers1.jpg
covers2.jpg
 
Last edited:
Top