WELCOME TO RIVER DAVES PLACE

This old house

angiebaby

Mountain Mama
Joined
Sep 24, 2007
Messages
4,263
Reaction score
4,980
So a little background about our house . . .

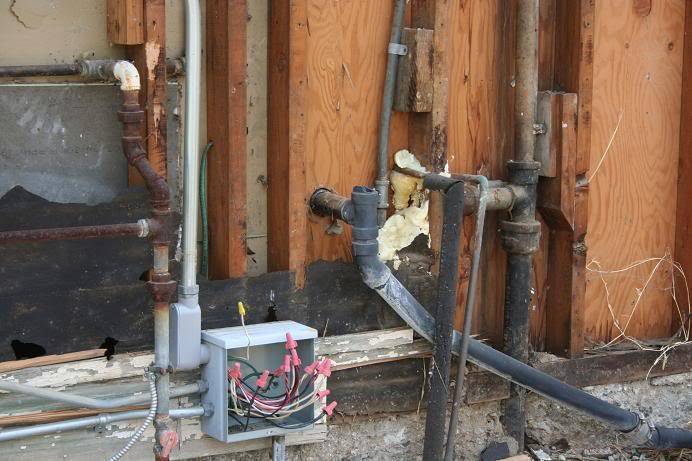
We live in Menifee and our house is part of the original homestead/mine of Menifee Wilson. There were both gold and quartz mines on the property. Our driveway, which many of you have driven down and know it is about a 1/4 mile long dirt road, was the original access road to the mine, assayers office and some other buildings which are still on the neighbors property. We have two old adobe houses on our parcels that we suspect were for mine workers built in the late 1890s. The original part of the house (the adobe part) is one large room, with lots of windows and a huge old fireplace. It had a sleeping porch on it which was eventually enclosed with windows and drywall and that is Cody's room. Eventually an addition was added (we suspect in the 40s) when two brothers owned the houses and would use them for quail/pheasant hunting vacations. There used to be a bird hunting club two parcels behind us. The addition included what is now the dining room, a bedroom, kitchen, bathroom and laundry. Jeff's parents bought it in 1973 and lived in it until their divorce in 1982. So Jeff lived here until he was 12. In 2000 it became available and we were able to fulfill one of Jeff's lifelong dreams of purchasing it back. Until Jeff sold his business, we really didn't have the time or the money to fix it up. It had fallen into disrepair in the last 30 years, the paint was peeling off the adobe (his parents were the last ones to paint it in the mid 70s), termites, delapidated clapboard, etc. So, here we are.


I don't have any pictures of the house before we started on this computer, but I'll have to round some up.

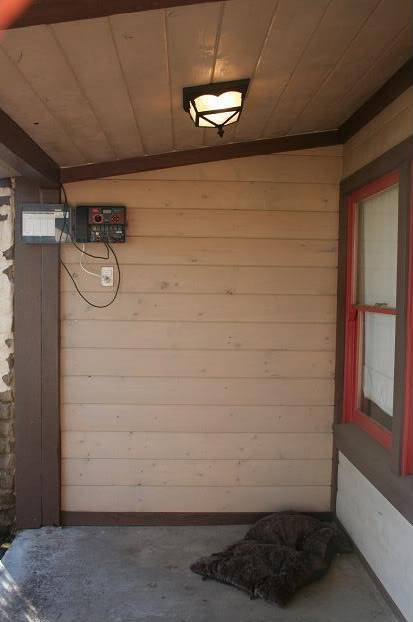
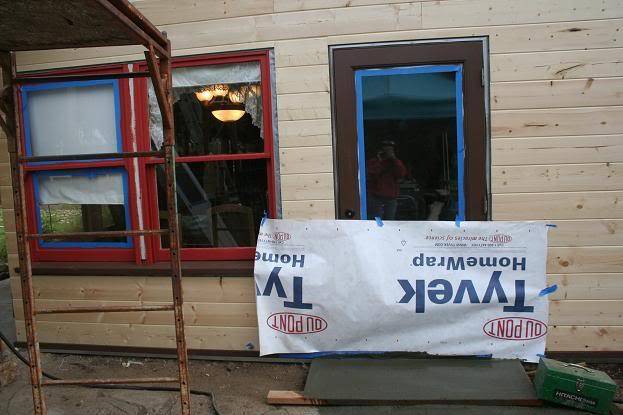
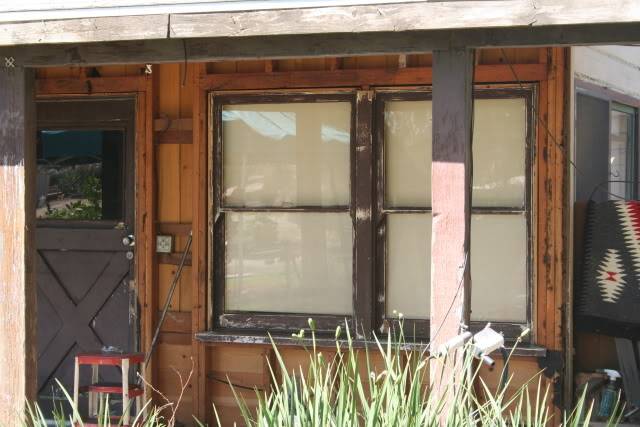
Here is the front porch and part of the adobe room. Jeff has already taken off the siding on the porch.
10.jpg


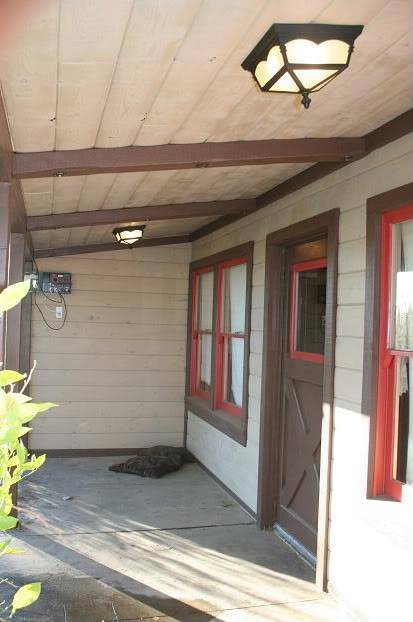
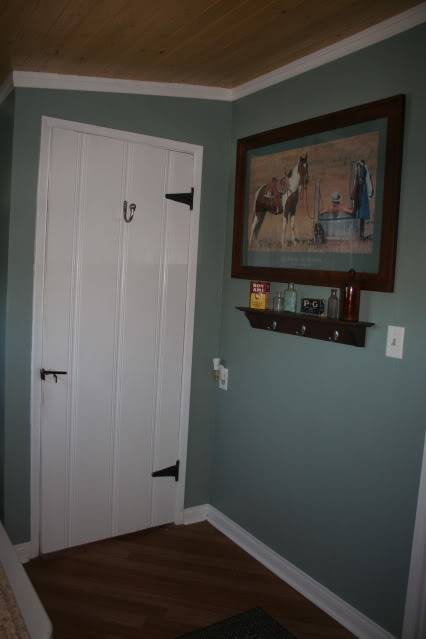
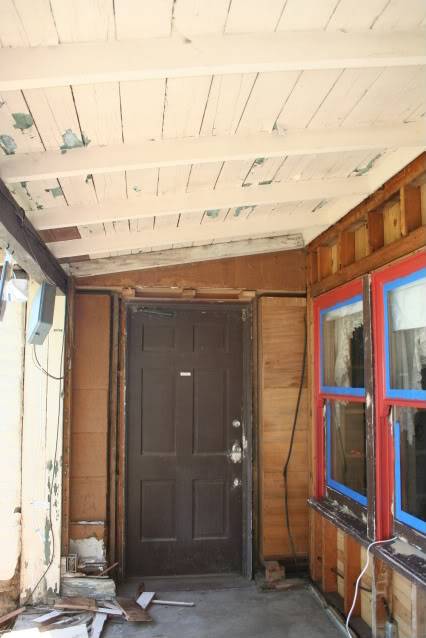
Closer view of the front door.
9.jpg


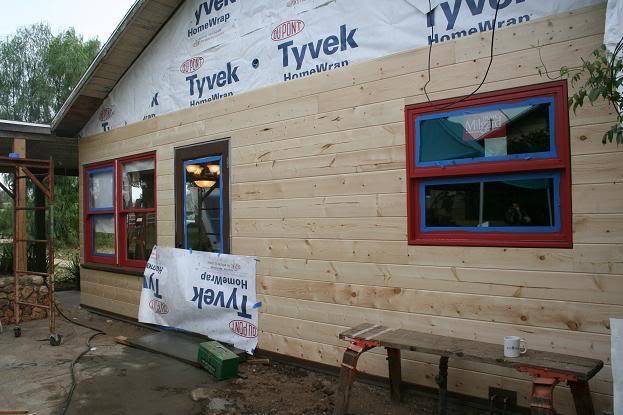
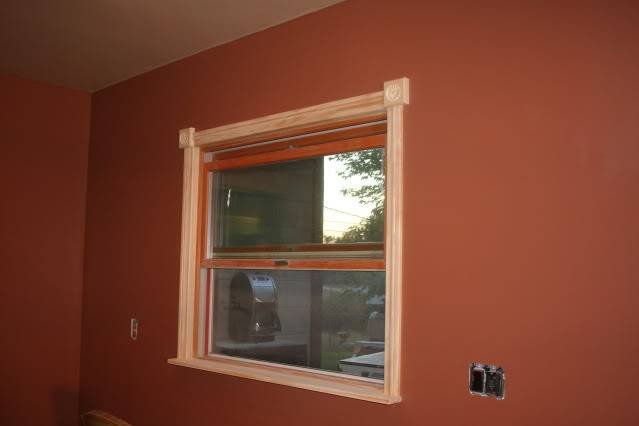
Front window of the dining room. Believe it or not, most of these windows still work. I think we only have to use sticks to hold two of them up. But we should have just replaced them. They are pretty drafty and single pane. Hopefully some weather stripping will fix the drafty part.
8.jpg


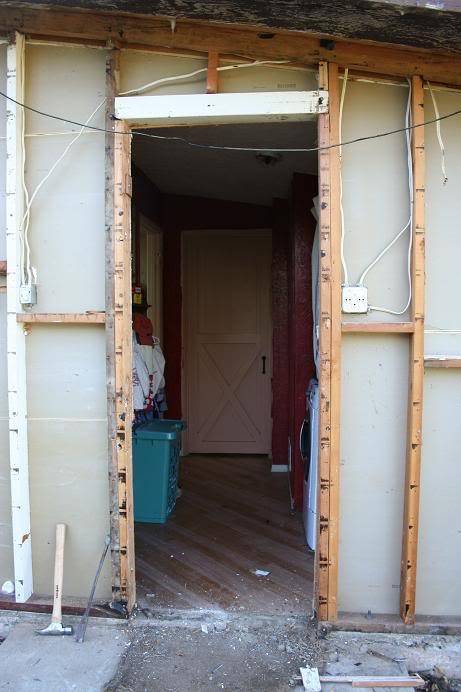
This is looking to the left on the porch. This was the original door into the adobe part, but we never used it, so it will disappear.
7.jpg
 

angiebaby

Mountain Mama
Joined
Sep 24, 2007
Messages
4,263
Reaction score
4,980
Goodbye door

This is after he installed insulation (there previously had been none. Just the clapboard and the inside panelling were all that kept the cold/heat out. You can imagine how well that worked. :rolleyes:
5.jpg


4.jpg


Installed Tyvek to keep the water out

2.jpg


This is where the new porch lights are going to go

1.jpg
 

angiebaby

Mountain Mama
Joined
Sep 24, 2007
Messages
4,263
Reaction score
4,980
Front is done, other than some wiring on the sprinkler box timer

houseremodel14.jpg


houseremodel28.jpg


This door will eventually be replaced. Jeff just painted the old one for now. The one we have picked out is beautiful!
houseremodel29.jpg


Where the door used to be

houseremodel30.jpg


note the porch light on the ceiling rather than next to the door
houseremodel31.jpg


Even the eves are pretty now
houseremodel32.jpg
 

angiebaby

Mountain Mama
Joined
Sep 24, 2007
Messages
4,263
Reaction score
4,980
Now around to the side. This is the right side of the house. The window with the air conditioner didn't work. When we moved in, the bottom window was gone and the renters had put in a peice of wood, they just threw the window away :smackhead Luckily, we found a replacement. But when they attached the wood, to make a tight fit, they had to destroy the exterior sash, so Jeff had to completely rebuild the window so that it wouldn't fall out when we took the a/c out (we will get a roof unit and ducting before the summer).

houseremodel11.jpg


The window on the right is the kitchen window. The glass was broken and it was always hard to open, so I asked Jeff to replace it. There was previously a little wooden cover over it that covered a flowerbed in that whole corner. No flashing, no weather proofing, so you can guess the termites really liked that area of my kitchen. Plus, the renter had the sprinklers spray right on that corner, all the way up to the window. :swear
Jeff had to replace a lot of the framing here.

houseremodel12.jpg


houseremodel13.jpg


He filled in around all the windows with spray foam (note there was no insulation on this wall either :D )

houseremodel15.jpg


This is his window after fixing it. It moves up and down now without falling out

houseremodel16.jpg


This side of the house is between the two houses. There is a little patio here, but we rarely use it. We always wanted to have a door on this wall (not through the laundry room) so we could have meals out on the patio in the summer. So on this wall, we installed a door.
 

angiebaby

Mountain Mama
Joined
Sep 24, 2007
Messages
4,263
Reaction score
4,980
You can see the water damage on the drywall in this pic. There were bees in this corner at one time. Jeff only found the honeycomb and some dried up honey, but the ants had carted off most of it. That sure explains my ant problem in the kitchen! LOL

houseremodel17.jpg


Kitchen window
houseremodel18.jpg


no kitchen window
houseremodel19.jpg


kitchen window!

houseremodel20.jpg


We had a rock wall that I think was installed by Jeff's dad. It was along the walkway that joins the houses. Again, no weather/waterproofing here. Just attach the concrete right to the house :rolleyes: Here is the lovely result of not doing things the right way

houseremodel26.jpg


houseremodel25.jpg


Just a "little" termite problem. When we get done, we plan to tent the house. We haven't seen a single termite, but I'm sure it's because we don't have water near the house anymore.
 

angiebaby

Mountain Mama
Joined
Sep 24, 2007
Messages
4,263
Reaction score
4,980
So here is the wall with new door, insulation, Tyvek, window and siding

houseremodel22.jpg


The part that sticks out here to the right is the laundry room. Jeff's dad and grandfather built that, and the floor is sloped. LOL.
houseremodel23.jpg


He had to pour a step because the threshold stuck out and hung over. We were afraid it would break off. Eventually, there won't be any dirt next to the house.
houseremodel24.jpg


Next step is to finish the siding, stain it, and get the trim up.
 

Sportin' Wood

Well-Known Member
Joined
Sep 24, 2007
Messages
1,919
Reaction score
5,527
Thanks guys,

I took the later part of last week off to go racing. I'll be back into the house late this week and hope to get the siding finished and stained. I have a lot of detail work to do over in that area. Angie did not mention I did a lot of wiring in this section as the old stuff was alum. and look real bad.

A correction;
The rock wall was there when we moved in back in the 70's. It is Rose Quartz mined from right here on the property. This project is very time consuming. I have to have make a lot of the trim pieces, and all the framing has to be firred out. The framing is nominal 2"x4" and replacement studs are only 3 1/2".
Hind sight being 20/20 I wish I would have replaced the front windows. I spent 40-50 hours rebuilding the window that was missing pieces. The window I replaced took 3 hours:rolleyes:

It is coming along very well and I hope to have it done by spring, with a new bath room and kitchen as well.
Hope fully Angie will keep this up to date.
 

whiteworks

Custom Shutters by WhiteWorks
Joined
Sep 25, 2007
Messages
15,355
Reaction score
9,098
very cool project, I have a 1913 craftsman style home that I have been restoring. Its alot of extra work to get these older places up to par. we have an old lumberyard here in town that stocks real 2x4's
 

WTRR

Not On The Boat
Joined
Dec 19, 2007
Messages
3,303
Reaction score
338
This is really cool. My house was built in 1902 and I've been remodeling it since I bought it 3 years ago. I replaced all 49, yep 49 windows in the house myself. Most of them are 6'0 3'0 windows. It really makes a difference. Except for some plumbing work, my wife and I have done it all ourselves.

Lookin good guys. :D
 

angiebaby

Mountain Mama
Joined
Sep 24, 2007
Messages
4,263
Reaction score
4,980
We got the whole side stained today and hopefully, Jeff will have the trim and eaves done or at least partially done by the end of the week. He's going to pre-run in Parker this weekend, and it'll be raining anyway. I'm glad we got the stain up before the next storm hits.
 

angiebaby

Mountain Mama
Joined
Sep 24, 2007
Messages
4,263
Reaction score
4,980
very cool project, I have a 1913 craftsman style home that I have been restoring. Its alot of extra work to get these older places up to par. we have an old lumberyard here in town that stocks real 2x4's


Where is that at? We may go down and pick up a handful. I'm sure he'll need to replace more.
 

whiteworks

Custom Shutters by WhiteWorks
Joined
Sep 25, 2007
Messages
15,355
Reaction score
9,098
Where is that at? We may go down and pick up a handful. I'm sure he'll need to replace more.

Hoyt lumber in downtown Upland for the real 2X4's. I also use an old lumberyard over in Pomona called C&E lumber "great place". I dont know if you guys want/need extra skilled labor for your project, but my calander is pretty open:D
 

TPC

Wrenching Dad
Joined
Sep 20, 2007
Messages
30,573
Reaction score
22,883
Best equity is sweat equity.
You guys are doing great.:beer
 

Yellowboat

Well-Known Member
Joined
Dec 18, 2007
Messages
16,110
Reaction score
6,369
If you guys need any paint/stain shoot me a PM I'll give you my account #s( cash) It will save you some money.( say 40+ % off retail)
 

angiebaby

Mountain Mama
Joined
Sep 24, 2007
Messages
4,263
Reaction score
4,980
So he finished the main part of the north side of the house a couple of weeks ago except for the last peice of facia that has to wait until we tear down the patio cover connecting the two houses.

houseremodel008sm.jpg


Then started on the laundry room pop out on Friday. He took all of the siding off Friday afternoon, but our nephews b-day party was Saturday so he did most of the following work on Sunday.

This is what it began as:

houseremodel005sm.jpg


Siding ripped off, old insulation and door removed. Note, there are no fireblocks at the top. :rolleyes:

houseremodel009sm.jpg


New door installed and almost ready for paint. Couple of new peices of lumber and fireblocks

houseremodel011sm.jpg


New insulation and plywood shear panels

houseremodel014sm.jpg


It's shiny!

houseremodel015sm.jpg


Ready for siding!

houseremodel016sm.jpg


He's got to go work on the race car next weekend, so the siding probably won't happen for a couple of weeks, but I'm planning on finishing up the door this week while I'm on spring break. I've stained the inside of the other door and need to lacquer it today, along with the inside of the kitchen window.
 

angiebaby

Mountain Mama
Joined
Sep 24, 2007
Messages
4,263
Reaction score
4,980
North side is done now

may006.jpg


may011.jpg


On to the back today. This is the side that gets the most sun. Most of the siding is rotten and the breaker box (replaced and upgraded last year) is in the way. A lot of the plumbing is run outside of the house. That's how the last owner did the re-pipe. :rolleyes: The original pipe is still there, some inside, some outside. So when he gets done, all of the pipe will be in the walls except for an electrical conduit that runs to a junction box that goes to the barn. This is the worst wall and will be the most challenging.

may009.jpg


Demo begun

may012.jpg


:eek: eek!

may014.jpg


Upon further discovery, the board that runs parallel to the concrete (the sill?) Has major termite/dry rot damage and needs to be replaced, meaning the whole wall needs to be reframed. That is the area behind the electrical panel. The windows go to the bathroom and they'll be replaced also.
 

Yellowboat

Well-Known Member
Joined
Dec 18, 2007
Messages
16,110
Reaction score
6,369
yes it is the sill, but it does not mean the entire wall needs to be reframed... you can cut it out and reaplce it. Also if you can, keep as much of that iron drain line... Its good stuff and is awhole lot quiter then the ABS.


While your at it have all the grounds attached to the plumbing removed and grounded correctly.( that shit really pisses me off and also reduces the life of your plumnbing.
 

Ivan Dan

Well-Known Member
Joined
Sep 29, 2007
Messages
3,070
Reaction score
105
DANG guys...the house is looking AWESOME!!!! Doesn't look anything like when I saw it last. Have any updated pics?
 

LBsuperJET

Well-Known Inmate #1155
Joined
Jan 31, 2008
Messages
614
Reaction score
432
hey sportin' woods', whats the progress on this build? i just caught it and im really diggin it!

Reid
 

Wheeler

I'm just here to bitch about others negativity.😁
Joined
Dec 25, 2007
Messages
24,921
Reaction score
39,106
hey sportin' woods', whats the progress on this build? i just caught it and im really diggin it!

Reid

I also just found this thread and am wondering what the progress is.

Looks great so far! You people are making me feel lazy, I should get off my ass and get something done around here. :smackhead
 

angiebaby

Mountain Mama
Joined
Sep 24, 2007
Messages
4,263
Reaction score
4,980
So here is the back before

may012.jpg


KOH09002.jpg


two new windows on the back

KOH09003.jpg


Before:
may009.jpg


KOH09009.jpg


KOH09012.jpg


new window, before there was just a peice of glass framed in with 1/2 inch moulding.

KOH09037.jpg


He redid the propane lines today
 
Last edited:

angiebaby

Mountain Mama
Joined
Sep 24, 2007
Messages
4,263
Reaction score
4,980
Jeff here again to lazy to log Angie off.

The back of the house really kicked my ass. The funding we were using got cut off like so many other people last year so we have had to go way slower and use cash, which is hard to come by nowadays. On top of that I took a Job as a project manager for a commercial construction company, the last thing I want to do on the weekends is you guessed it construction.

In the morning I will finish the last of the Copper re pipe. I only have the service to run. Then I can finish the siding. the walls have been closed up and weather proof all winter but I wanted to wait till there was no chance of rain to install the siding as this section of the house sees the worst weather.

Next will be repair to the foundation at the rear of the house, and then I will almost be done with the exterior except for the adobe repair. We have been doing some testing of different products on it, and it looks like we will do a wainscot in the worst damage area's of a cultured stone product, and apply a smooth finish coat of stucco in the better area's. I started removing the paint in a few spots and I really wish I could leave it exposed as it looks really cool.

Thanks Angie for sharing the pictures of my project.
Jeff
 

whiteworks

Custom Shutters by WhiteWorks
Joined
Sep 25, 2007
Messages
15,355
Reaction score
9,098
Looking good, I know what you mean about doing construction all week only to come home and have to do it for free and foot the material bill. Good to see someone else plinking away and getting it done:thumbsup
 

angiebaby

Mountain Mama
Joined
Sep 24, 2007
Messages
4,263
Reaction score
4,980
Plinking away is about all it is nowadays. I really want to get done with the stuff you can't see, and move on the the frosting.

Jeff
 

TeamGreene

Well-Known Member
Joined
Dec 19, 2007
Messages
4,604
Reaction score
9,282
:thumbsupLooks good you have come a long way:thumbsup
 

angiebaby

Mountain Mama
Joined
Sep 24, 2007
Messages
4,263
Reaction score
4,980
Wow, been a long time since I updated this thread. Outside is done for the most part. Still need to trim the windows and paint the adobe part, but that can be done while it's listed.

We completed the bathroom, I don't really have any before pics unfortunately :(

Here is the beginning of the demo

chasetruckbuild051.jpg
[/IMG]

chasetruckbuild052.jpg
[/IMG]

chasetruckbuild054.jpg
[/IMG]

chasetruckbuild071.jpg
[/IMG]
 

angiebaby

Mountain Mama
Joined
Sep 24, 2007
Messages
4,263
Reaction score
4,980
Unfortunately, we couldn't change the plugs. The wiring is so old it's wrapped with cloth insulation. The fuse box (yes, fuse box) is right behind the cowgirl picture. The wire itself is very brittle and anytime you try to change anything out, it breaks. And there's not enough slack to let you pull more. Very frustrating. Rather than change out all the electricity in the room. We left it. He did change it all out in the kitchen, though.
 

Yellowboat

Well-Known Member
Joined
Dec 18, 2007
Messages
16,110
Reaction score
6,369
YOu know its not always cloth... often it was rag paper( same stuff they make bills out of)


The only saying, they don't build them like the use too... trust me its a good thing.
 

angiebaby

Mountain Mama
Joined
Sep 24, 2007
Messages
4,263
Reaction score
4,980
Here's the kitchen pre demo:

kitchen001.jpg


kitchen002.jpg


kitchen004.jpg


Demo begins- this is where the cabinets in the above pic were.

kitchen005.jpg


kitchen008.jpg


kitchen007.jpg
 
Last edited:

angiebaby

Mountain Mama
Joined
Sep 24, 2007
Messages
4,263
Reaction score
4,980
kitchen010.jpg


kitchen011.jpg


Knocked the light fixture out and completely replaced ceiling.Made it a lot warmer in there since there was more room for ceiling insulation.

kitchen009.jpg


All new wiring, moved the gas over a little.

kitchen021.jpg


Termite damage. This peice of wood was literally just paper on the outside and completely hollow. It was the only one like that. The rest had no damage. We figure it must have been just "that much" softer than the others.

kitchen016.jpg
 

angiebaby

Mountain Mama
Joined
Sep 24, 2007
Messages
4,263
Reaction score
4,980
Wall the stove and fridge are on:

kitchen024.jpg


New ceiling and lights. They are on a dimmer and that is VERY cool for early morning wakeups! Plus, I can leave them on low when the kids stay out late, so they can see when they come in. And we covered the old beam with new wood. The old one was cool, as it was recycled wood, but it had two big drill holes in it from it's previous life.

kitchenremodel009.jpg


The window was in there for a while (we replaced the kitchen and bathroom windows when we were doing the outside. The bathroom windows were painted shut before) but Jeff finally trimmed it out and I stained/laquered it.

kitchenremodel007.jpg


First cabinets going in

kitchenremodel011.jpg


kitchenremodel012.jpg


I LOVE my sink! It's ground granite. Love the color and it's so durable. You can't hurt it. Just have to oil it once in a while to keep the hard water marks off of it.

28722_1492549160250_1429673935_1302814_747870_n.jpg


kitchenremodel059.jpg
 
Last edited:

angiebaby

Mountain Mama
Joined
Sep 24, 2007
Messages
4,263
Reaction score
4,980
Here it is, finally complete! We did the last few items the 23rd of December. Cell phone pics, I apologize for the crappy quality

165127_1768859187828_1429673935_1930572_7451287_n.jpg


166465_1773571865642_1429673935_1939966_3858135_n.jpg


It was about $600 more per cabinet to have drawers put in, so I picked these up at Lowe's for $189 per cabinet. If you have cast iron, these are a godsend. I think only the corner lazy susan has shelves. No more reaching in for heavy items.

163419_1773569465582_1429673935_1939964_7766338_n.jpg


We added about 6 inches to the bar area here and made it two levels with a plug there. The trashcan is a pullout unit right below the bar in the main prep area. It's so convenient to be cutting/cooking and have the trash right there to shove everything into. I wish I had the room to have one near the sink also, but in a 10x9 space, we just couldn't do it.

166400_1773566065497_1429673935_1939962_3425044_n.jpg


The area under the glass doors is also an extention. The kitchen ended where the wood began and I had a shelf that was a "catch all" and always messy. We got rid of the big ugly old hutch we had and moved all the glassware into the uppers and the plates into the lower drawers. Tablecloths and big serving platters and warming trays go in the bottom drawer. Silverware is in the top. It's right next to the table, so it's really convenient. Plus, I have about 8 feet for a large serving counter. I had a crock pot, 3 chafing dishes and all of the serving ware on it during our party on Christmas Eve.

165351_1773563225426_1429673935_1939958_1131579_n.jpg


162715_1773553225176_1429673935_1939955_419756_n.jpg
 
Last edited:

kevnmcd

Well-Known Member
Joined
Feb 20, 2008
Messages
1,930
Reaction score
476
Wow! You guys have done an amazing job! Keep up the good work and keep updating this thread.
 

BLOWN HOWARD

Well-Known Member
Joined
Sep 24, 2007
Messages
1,290
Reaction score
310
Congrats looks awsome. Dont know about most of you but i like the looks and feel that you get from an older house than most of these new track homes.
 

rivermobster

Club Banned
Joined
Dec 28, 2009
Messages
56,558
Reaction score
53,933
Ahhh remodels. So much fargin work, but so awesome when they are done.

Very nice work indeed. :thumbsup
 

angiebaby

Mountain Mama
Joined
Sep 24, 2007
Messages
4,263
Reaction score
4,980
Working on the master bedroom now. Hoping to make it look like a late 19th century cathouse ;) It should be done the weekend after Easter. Taking the carpet out this weekend and have been stripping wallpaper for the last two weekends. Not fun. Not even a little bit.
 

plaster dave

Face down A$$ up
Joined
Sep 28, 2007
Messages
7,916
Reaction score
2,617
Working on the master bedroom now. Hoping to make it look like a late 19th century cathouse ;) It should be done the weekend after Easter. Taking the carpet out this weekend and have been stripping wallpaper for the last two weekends. Not fun. Not even a little bit.

Wall paper does suck.
 

Yellowboat

Well-Known Member
Joined
Dec 18, 2007
Messages
16,110
Reaction score
6,369
you know you can seal it with oil base then skim over right? some times its just not worth removing.
 

angiebaby

Mountain Mama
Joined
Sep 24, 2007
Messages
4,263
Reaction score
4,980
If it had been done right to begin with, that might have been an option. But it was lifting and torn in a lot of places. Most things on this house have been done half-assed. That's why it's taken so long. Take it apart, fix it, then redo it the right way. For example, we have wainscoating in the bedroom that matches the family room. The addition of an alcove in the bedroom doesn't have the wainscoating, but the closet had it all the way up the wall. So, Jeff decides to take it out of the closet to make the entire room match, then drywall the closet. Of course, there is zero insulation in the closet, so that has to be put in, but the good part of the story is the wall that the closet shares with the bathroom. The plumbing is in that wall. The vent from the toilet/shower has been completely cut off right above the union, about 3 feet from the floor. So it's venting in the wall. Nice. So now he has to fix the plumbing also. Most of this mess is because of the dumbass-pot smoking renter that lived here for 10 years before we bought the place.
 

angiebaby

Mountain Mama
Joined
Sep 24, 2007
Messages
4,263
Reaction score
4,980
So our new bedroom has got to be one of the sexiest ever. It's real small (10x10), as bedrooms were 100+ years ago, but there has been an addition of an alcove in the last 25 years (4x6) and the addition of a door into what became a "jack and jill" closet. Well, part of this remodel was Jeff put a wall in this closet, so our son and I have private closets now and he doesn't have access to our room via the closet anymore.

So this is what it originally looked like
 

Attachments

  • bedroom1.JPG
    bedroom1.JPG
    39 KB · Views: 228
  • bedroom2.JPG
    bedroom2.JPG
    40.7 KB · Views: 234
  • bedroom3.JPG
    bedroom3.JPG
    50.7 KB · Views: 228
  • bedroom4.jpg
    bedroom4.jpg
    32.7 KB · Views: 238
  • bedroom5.JPG
    bedroom5.JPG
    35.4 KB · Views: 232
  • bedroom6.jpg
    bedroom6.jpg
    23.3 KB · Views: 233

angiebaby

Mountain Mama
Joined
Sep 24, 2007
Messages
4,263
Reaction score
4,980
The alcove is where the french doors are above. There was old carpet in the 10x10 area, fake river rock in the alcove, and linoleum in the closet. The French Doors were always drafty and never closed right. The window to the right of the alcove was a peice of plexi-glass the entire length of the wall when we moved in so the sunlight would warm the renters pot growing in the closet. So that window got replaced a while back, but the drywall and stuff didn't get put up.

Here is what it looks like now.

Oh, and the wall between the alcove and the little closet is adobe, we discovered, so we decided to leave it and not cover it up. Our goal was to make it look like a western bordello. I'm working on getting some old-timey pictures of ladies (just one or two) and putting them together with some tokens and a key that I got off ebay to make a display in the alcove or on a small wall. We are headed up to Virginia City/Reno area next month and plan to hit some antique shops and see what we can find. I also ordered some kerosene lamps that have been converted to electricity.
 

Attachments

  • bedroom11.JPG
    bedroom11.JPG
    64.1 KB · Views: 214
  • bedroom10.JPG
    bedroom10.JPG
    51 KB · Views: 222
  • bedroom9.JPG
    bedroom9.JPG
    76.7 KB · Views: 219
  • bedroom8.JPG
    bedroom8.JPG
    54.4 KB · Views: 209
  • bedroom7.JPG
    bedroom7.JPG
    76.3 KB · Views: 217
  • bedroom13.jpg
    bedroom13.jpg
    49 KB · Views: 212

rivergames

Well-Known Member
Joined
Jan 7, 2008
Messages
15,858
Reaction score
13,119
Wow, that really turned out great :thumbsup
 

kentkenford

New Member
Joined
Jul 25, 2011
Messages
4
Reaction score
0
I like the step by step improvement of the old house.. way too cool..:champagne:
 
Top