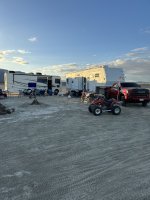
WELCOME TO RIVER DAVES PLACE

Toy hauler Reno! Again. Input welcomed/needed

DoughBallin14

Well-Known Member
Joined
Apr 22, 2014
Messages
973
Reaction score
1,157
Got some flooring done and had to take a break for family dinner!
Used some schluter vinyl floor transition and edging metal on slide areas.

Wife got down on the old day night shades good old oxy clean soak in the tub with some scrubbing. Wish i took a picture. It was terrible to see that much dirt come off those, she got em all dry and mounted back up in the trailer. Its all Coming together finally.
Still need to address the loose brake backer plate issue and finish the other side shackle and equalizer i started yesterday
IMG_4423.jpeg
IMG_4424.jpeg
IMG_4425.jpeg
IMG_4426.jpeg
IMG_4427.jpeg
IMG_4428.jpeg
 

DoughBallin14

Well-Known Member
Joined
Apr 22, 2014
Messages
973
Reaction score
1,157
Man its coming together gents.
Got pretty much the main floor done and ready to move up to part of the upstairs area next.
Started getting the old but newly wrapped valance covers up on the wall and did some cleaning.
Wife brought the kids in so we could still get some stuff done.
These small details take time but its definitely wins and coming together. Also got the otherside shackles and equalizers done and fixed the brake drum backer plate that came loose. As well as wired and tested the brakes.
Will get back to the bench soon, but figured i cant use the trailer without flooring so switched gears. Stay tuned!
IMG_4430.jpeg
IMG_4431.jpeg
IMG_4433.jpeg
IMG_4436.jpeg
IMG_4438.jpeg
 

DoughBallin14

Well-Known Member
Joined
Apr 22, 2014
Messages
973
Reaction score
1,157
Been gettin down on the get down after work every day. Told my hoa this turd is here for the week. We leave may 4th for the river set up weekend. Got the bench just about wrapped up, minor touch ups and corner guard moldings to do all around the trailer along with probably some small quarter shoe for the floor, bench cushion and backs should he here saturday from Recpro, storage ottomans should be here tomorrow, remove able table posts should come saturday also for one half of the table. There will be 4 posts and two 24x48 wood table tops so we can remove one or both of we wish since this is also our lounge seating.

Yes one bottom section of window is covered but it is still usable and from the out side it is black painted to blend better.

IMG_4471.jpeg
IMG_4472.jpeg
IMG_4475.png
IMG_4474.png
 

DoughBallin14

Well-Known Member
Joined
Apr 22, 2014
Messages
973
Reaction score
1,157
Update!!!

We made it yesterday evening! Got the trailer just finished enough to enjoy it for the summer and after that we will get into some detail work and pick up on some projects after the summer!

Worked on the trailer all last weekend. And during the week to get it packed and ready to go enough.

Got the flooring all done and most of the base trim to hide the movement gaps for the floating floor to expand and contract.

One set of table posts showed up so i managed to get one top stained, sealed, and mounted for the weekend. For the other table one post shows up monday and the other Thursday so next river trip I’ll bring that stuff and get it all set up to have both table which equal 8 feet of eating space. Nice to have 2 4 foot tables we can split up when we want.

Also waiting on one more back cushion to finish up the bench seating. Probably another week still on that one.

Passed on the line x dealio for the garage area for now and kinda ran out of time, as a temporary deal i eneded up going to the good old harbor freight for some 24x24 foam garage tiles, laid them out and attached to the walls actually turned out pretty nice for a quick job to have it comfy and safe for the 9 month and 4 year old!

Ah yes and the shiplap accent wall that the wifey wanted, its mostly done need to fill in the pinner nail holes and paint it, luckily the primer white is pretty close to the wall colors so it will do for now!

Dont mind the unloaded mess in the pics haha turned into a toss it in there and deal with it later deal!!

Time to head out to Dumas Walkers for some food and coldies!
Happy cinco de mayo boys and girls!


IMG_4478.jpeg
IMG_4486.jpeg
IMG_4491.jpeg
IMG_4509.jpeg
IMG_4510.jpeg
IMG_4511.jpeg
IMG_4512.jpeg
IMG_4514.jpeg
View attachment 1227120
IMG_4542.jpeg
IMG_4541.jpeg
IMG_4540.jpeg
IMG_4539.jpeg
IMG_4546.jpeg
 
Last edited:

scottchbrite

Well-Known Member
Joined
Jul 16, 2012
Messages
965
Reaction score
1,789
Looks good. I like the garage area with the tiles instead of the Line X idea. I think you could do the coating for the winter toys and put the padding back for the summer. Are you going to put up bubble wrap in the windows for the summer?
 

DoughBallin14

Well-Known Member
Joined
Apr 22, 2014
Messages
973
Reaction score
1,157
Looks good. I like the garage area with the tiles instead of the Line X idea. I think you could do the coating for the winter toys and put the padding back for the summer. Are you going to put up bubble wrap in the windows for the summer?
Thanks scotty,
I was thinking that same thing actually. It went down pretty quick and easy. Keeping that winter list up to date haha.

Got the bubble wrap all done and cut tight over the weekend. Especially in the garage with the kids. Had to get it dark in there so they would sleep better.

I want to do the button snap shade screens on the outside of the windows and contemplated tinting the windows as well. Either darker or clear solar rejection film.

Also swing by the house sometime i got your fuel jug ready to go
 

scottchbrite

Well-Known Member
Joined
Jul 16, 2012
Messages
965
Reaction score
1,789
Thanks scotty,
I was thinking that same thing actually. It went down pretty quick and easy. Keeping that winter list up to date haha.

Got the bubble wrap all done and cut tight over the weekend. Especially in the garage with the kids. Had to get it dark in there so they would sleep better.

I want to do the button snap shade screens on the outside of the windows and contemplated tinting the windows as well. Either darker or clear solar rejection film.

Also swing by the house sometime i got your fuel jug ready to go
If you remember, my trailer had the exterior screens on it. They worked ok. I ended up with bubble foil in the windows too. The worst part was getting the screens to stay on. I did t want to rivet into the side of the trailer. It had some stick on things that worked so, so. It is nice being able to take The foil off for some natural light and not cooking yourself.
I went back to work early for more OT. Ill come by on my way home
 

DoughBallin14

Well-Known Member
Joined
Apr 22, 2014
Messages
973
Reaction score
1,157
If you remember, my trailer had the exterior screens on it. They worked ok. I ended up with bubble foil in the windows too. The worst part was getting the screens to stay on. I did t want to rivet into the side of the trailer. It had some stick on things that worked so, so. It is nice being able to take The foil off for some natural light and not cooking yourself.
I went back to work early for more OT. Ill come by on my way home
Ah ya thats right. The foil seems to be the best and only option for those summer days. I can say both ac worked great so far. It was almost 90 last weekend and they cycled on and off at 70, put in new start/stop capacitors just because and cleaned the condenser fins. Ready for the heat.
 

DoughBallin14

Well-Known Member
Joined
Apr 22, 2014
Messages
973
Reaction score
1,157
Annnndddddd! We are back at it now that the river is over for us.
Starting right where i left off.
Getting ready for a short ocotillo desert trip veterans weekend and then heading back out late thanksgiving.
The summer was fun and trailer worked great for us, ac was chillen, batteries barely survived, little ac/dc converter trouble at one point.

So noticed that there was a little flex and settling/flexing on the section of the water damage wall sill plate i replaced last winter.
It is still very solid but i wanted to go around and add some more outrigger supports for that area and also more around the whole trailer as the factory z bracket outriggers are like every 6-8 feet. I am probably going to add some under the slide out tray.

PS this is not weld porn haha havent pulled a trigger on a mig in like 15 years! Basically 1x3 .120 with angle on the end to support the walls and sill plate from the bottom as well keeping it flexing outward as the slide moves in and out. In this pic the 1x3 standing on its side in the background i butted up against the one solid frame outrigger and the. Welded the 1x3 to face of that support.
Also need to get under the trailer and re weld some of the flimsy frame cross braces i saw when i was changing all the shackles and pivots.

Also got the garage floor prepped and half sprayed with bedliner, harbor freight special gallons and a duplicolor syphon spray gun.
So far so good easy to control the thickness and coverage. Roughly 30psi on the gun and sprays nice. The harbor freight liner is pretty thick so had to thin it out with some acetone.
The wall sections took almost a gallon but i did 3 solid coats. We will see how it holds up.

More tomorrow! Hoping i can get to my lithium battery retro done next weekend! The leas acids are toast!!!!
IMG_5675.jpeg


IMG_5674.jpeg
IMG_5676.jpeg
IMG_5677.jpeg
IMG_5679.jpeg
IMG_5678.jpeg
IMG_5680.jpeg
IMG_5681.jpeg
IMG_5682.jpeg
 
Last edited:

DoughBallin14

Well-Known Member
Joined
Apr 22, 2014
Messages
973
Reaction score
1,157
We are officially lithium running on the trailer. Had to do a change up on the battery but i got in the tiny cubby, did some wire tracing, paint marked the wires, installed a distribution strip for posi and negi to clean up some of the clutter, crimped and heat shrinked some old and new connectors while i was there. A few zipties to clean it up a touch and we are good.

Changed my charge patterns for my outback solar controller and onboard converter. So far so good! Happy that project is done and i have just enough room to add one more of these if needed. I will see how the single 300ah battery goes.
We dont dry camp to long at one time and we have solar and generator if needed for times.

On to the next item on the list.

IMG_0053.jpeg
IMG_0052.jpeg
IMG_0054.jpeg
IMG_0055.jpeg
IMG_0059.jpeg
IMG_0057.jpeg
IMG_0056.jpeg
 

DoughBallin14

Well-Known Member
Joined
Apr 22, 2014
Messages
973
Reaction score
1,157
Easy weekend here. Sucked at pictures this weekend. Got just enough worked out to go do some ocotillo dry camping for vets weekend for a small tester trip with my rig and the parents new to them motorhome.

-Kept an eye on how my lithium battery was doing since i installed it Friday, i need to get my shunt still to help monitor it better, i ran all lights, radio, slides in and out all weekend and my solar controller only clicked on for a minute to top off according to the data log on the controller.

- found my water heater wasnt heating on gas the last couple river trips. Did some trouble shooting and found one bad gas valve solenoid. Pretty sure previous owner never changed the anode rod so i did that and back flushed heater, i was correct there wasnt a rod left haha just the cap. All else was good. Glad i fixed that.

- replaced the broken straps on my dump pvc piping. All rusted and swinging. All good now.

- oh and big one was re piping my generator exhaust. Idk who touched it before but the exhaust would heat and has melted spots onto the bottom of the black tank.
Also found my genny would quit running after 20-30 minutes of running. Pretty sure my electric fuel pump is taking a shit after it heats up. After the genny shuts off it will not restart right away, also the pump will not prime unless i let it sit. Also its the only thing that is original from 2007 on the genny.
New pump and filter will be here tomorrow.

-fuel pump station works! And pumped clean debris free fuel so thats a plus! Just need to replace the hose as its a bit dry and stiff.

IMG_0067.jpeg
IMG_0066.jpeg
IMG_0065.jpeg
IMG_0064.jpeg
 

DoughBallin14

Well-Known Member
Joined
Apr 22, 2014
Messages
973
Reaction score
1,157
Well so far so good. Got the new solenoids for the water heater gas valve, got the anode rod in and new switch for the electric heater element,
Genny has ran now for 2 ish hours at a time and no hiccups after new fuel filter and pump, indoor heater worked no problem through the night.

Found my next issue though! Ill check it out after the weekend, when the fridge is on LP it wont light unless i use a lighter for the pilot, but problem is the fridge reaches temp and shuts off and wont re light giving me the check light, unless i turn it off then on and go light the pilot again.
So ill hunt down why my pilot wont light the propane.

But we are enjoying it either way!

IMG_0110.jpeg
 

DoughBallin14

Well-Known Member
Joined
Apr 22, 2014
Messages
973
Reaction score
1,157
Not really trailer remodel related but i like to add all kinds of info in case others are wondering, luckily just in time for our desert trip for Thanksgiving, my long waited Gen-Y hitch mount finally showed up for the 24’ gmc.

This is the 5” offset goose puck mount for the factory puck system, if you guys recall my trailer has had a goose neck adapter welded onto it for over 10 year from the previous owner and i have not made it a high priority to drop that money to change the whole pinbox to a reese goose box or a gen y torsion flex goosebox.

I can say i knew gm set the puck systems farther back then the others but i never actually measured the distance from the front inside rail of the bed measuring back to the center of the ball mount.

So my 02 chevy 8.1 and 08 lmm was 35 inches to the bw flip ball hitch system. I also used the bw offset goose ball to make it 38.5 inches.

Now the 24 3500srw center of the ball mount on the puck system is 44 inches! Now with the offset is 48.5” crazy difference
now i can truly do a 90degree turn which i dont plan on ever doing but i know for sure i wont take out my back window like i did last year on my 02 chevy.

Tomorrow will be the first time towing with the 24’ obviously so looking forward to seeing how it handles compared to veterans weekend when i towed to ocotillo with my 02.


Also i was told by GenY that gm changed the puck mount dimensions again on the 24’ year trucks so measure and verify with them for proper model number. Apparently gm cant stick to a dimension so it changes all the time between years and box size etc.

IMG_0154.jpeg
IMG_0156.jpeg
IMG_0157.jpeg
 

yz450mm

Well-Known Member
Joined
Jun 10, 2013
Messages
3,428
Reaction score
6,775
Not really trailer remodel related but i like to add all kinds of info in case others are wondering, luckily just in time for our desert trip for Thanksgiving, my long waited Gen-Y hitch mount finally showed up for the 24’ gmc.

This is the 5” offset goose puck mount for the factory puck system, if you guys recall my trailer has had a goose neck adapter welded onto it for over 10 year from the previous owner and i have not made it a high priority to drop that money to change the whole pinbox to a reese goose box or a gen y torsion flex goosebox.

I can say i knew gm set the puck systems farther back then the others but i never actually measured the distance from the front inside rail of the bed measuring back to the center of the ball mount.

So my 02 chevy 8.1 and 08 lmm was 35 inches to the bw flip ball hitch system. I also used the bw offset goose ball to make it 38.5 inches.

Now the 24 3500srw center of the ball mount on the puck system is 44 inches! Now with the offset is 48.5” crazy difference
now i can truly do a 90degree turn which i dont plan on ever doing but i know for sure i wont take out my back window like i did last year on my 02 chevy.

Tomorrow will be the first time towing with the 24’ obviously so looking forward to seeing how it handles compared to veterans weekend when i towed to ocotillo with my 02.


Also i was told by GenY that gm changed the puck mount dimensions again on the 24’ year trucks so measure and verify with them for proper model number. Apparently gm cant stick to a dimension so it changes all the time between years and box size etc.

View attachment 1305921 View attachment 1305922
View attachment 1305923
Get ready to smile, the comparison between the two trucks is not even in the same universe.

In fact, it's not even within the same five universes. You're going to be amazed from start to stop, the towing experience on these 24 trucks is Head and Shoulders above even a couple of years ago.

People can shit on the cost of these trucks all day long, but until they tow heavy with them then I don't even want to hear it.
 

Flyinbowtie

Well-Known Member
Joined
Sep 25, 2007
Messages
11,929
Reaction score
10,212
Doughballin you have done one hell of a job on that 5er. You will enjoy the mods for a long time to come. Congrats on the new truck.
I look, but am at that point in life where I don't want to drop the $$.
We ride in Northern Nevada the most, come over the hill from Nevada County. Been making that trip for over 40 years. Hoping to move over that way this coming spring, if the damn market gets any steam in it.
I see your pic at Sand Mountain, my first trip was in 1982 LOL. We have had a lot of fun there, but too many people, we go further out these days most times. "Off weekends" are rare.
I know RenoDaytona rides and so do a couple other guys up there, we need to get an RDP meet up going next spring.
 

DoughBallin14

Well-Known Member
Joined
Apr 22, 2014
Messages
973
Reaction score
1,157
Get ready to smile, the comparison between the two trucks is not even in the same universe.

In fact, it's not even within the same five universes. You're going to be amazed from start to stop, the towing experience on these 24 trucks is Head and Shoulders above even a couple of years ago.

People can shit on the cost of these trucks all day long, but until they tow heavy with them then I don't even want to hear it.
Thanks for the encouragement i never doubted it thats for sure just the cameras and feel alone driving it around town is great. Looking forward to the drive. Actually really nice to load up the trailer and the truck squat just to level and i dont have airbags or compressor to deal with. Might not even add them on this truck. Maybe just do timbrens and better shocks.
I definitely like the trailer brake controller location on the center console and the turn signal cameras when towing.
 

DoughBallin14

Well-Known Member
Joined
Apr 22, 2014
Messages
973
Reaction score
1,157
Doughballin you have done one hell of a job on that 5er. You will enjoy the mods for a long time to come. Congrats on the new truck.
I look, but am at that point in life where I don't want to drop the $$.
We ride in Northern Nevada the most, come over the hill from Nevada County. Been making that trip for over 40 years. Hoping to move over that way this coming spring, if the damn market gets any steam in it.
I see your pic at Sand Mountain, my first trip was in 1982 LOL. We have had a lot of fun there, but too many people, we go further out these days most times. "Off weekends" are rare.
I know RenoDaytona rides and so do a couple other guys up there, we need to get an RDP meet up going next spring.

Much appreciated!! Really tried to get it just right! Not sure if its a labor of love but i know the family has been enjoying it so much and i have more plans to clean up some small stuff and do more touches.

I grew up on a friend’s 40 acres at the end of split mountain road before the train tracks. It was decked out with a natural track, gravel paved circles for rvs, water tower, sewer leach field, fenced off shooting range down into the wash on their property, it was good times

Last time i was there or talked to them was at least 12 years ago and now with my own family and my parents we like to stay on the lake bed way down split mountain. Barely anyone stays down there and its safe to watch the kids ride and run around in the flat wide open area. Never have to worry about wakinh up with random groups camping right next to you.
I am on the lookout for around 3-5 acres out there to make a fenced in compound of our own one day like i grew up on.

I am only an hour 30 minute drive not towing, if anyone wants to do a random meet up for riding out there i dont mind day trips! Or plan a weekend.
 

Justsomeguy

Well-Known Member
Joined
Apr 26, 2020
Messages
1,119
Reaction score
1,771
Holy cow. This is amazing. I've been reading this since last night. I had to put my phone down because I couldn't keep my eyes open anymore. But I wanted to keep going, this is an amazing thread. You sir have some talent. I couldn't fathom this.

I'm trying to figure out inverters and my head is spinning. You basically rebuilt an entire trailer and made it stronger. Hats off to you sir.
 

DoughBallin14

Well-Known Member
Joined
Apr 22, 2014
Messages
973
Reaction score
1,157
Holy cow. This is amazing. I've been reading this since last night. I had to put my phone down because I couldn't keep my eyes open anymore. But I wanted to keep going, this is an amazing thread. You sir have some talent. I couldn't fathom this.

I'm trying to figure out inverters and my head is spinning. You basically rebuilt an entire trailer and made it stronger. Hats off to you sir.
Thanks for the kind words! Its been a crazy year of work on it! Still more i need to do and many things i want to do. The list still grows as things get completed but we have been using it and thats what matters!
 

DoughBallin14

Well-Known Member
Joined
Apr 22, 2014
Messages
973
Reaction score
1,157
We are back from the weekend and it went awesome as usual, the kiddo got some more riding on his 50. Weather was fine for us, came home late evening yesterday because my little girl broke out in a fever and would not relax or nap so we packed it up! She is doing great today and it was nice taking my time to clean up the rig.

Now the real story is towing the trailer with the new truck!!! This is a comparison is of trucks 22 years apart haha.

Back story-
1. had a 2008 chevy lmm duramax on a diet and built pretty far, didnt own this trailer so not including this truck.

2. Bought “Goldmember” as an interim truck while i waited for the 24’gmc truck changed to be reviled and be able to order one. 2002 Chevy 2500hd crew cab 8.1/allison combo woth 125k miles. Stupid cheap deal that i wasnt looking for but couldnt pass it up.

3. Bought trailer in december started remodel etc. towed to the river and one desert trip(two weekends ago) with the chevy.

4. 24’ gmc 3500srw at4 arrived early thanks to Dutton GMC. I think it was September. Ordered my GenY goosepuck offset hitch right away and had a long lead time.. towed trailer home from river season and one desert trip with goldmember, while a fancy truck sat at home waiting! Finally this weekend i got it set up and adjusted.

Here is the trailer specs online. My next goal is to actually get it weighed.

IMG_0162.png

So i will have to agree with @yz450mm that this 24’ truck is a world of difference! Holy crap between tech, ride quality, power, visuals, engine braking etc.

Some hills to and from ocotillo wells i was flat footed with the 2002 doing 32-35 mph at the top she was chugging, cubic inches still gettin it done! Along with a 6mpg average on that trip! Had to take 10 gallons from the trailer pump tank before we left to get back home without stopping. Idk why these truck came with only 24gallon tanks.

24 truck on the same hills was chillen gaining speed while climbing at maybe half throttle keeping 50-55mph. Way smoother ride and dampening, less chucking, braking was super solid and progression on the brake controller was smooth. Only thing i didn't like which i can fix if my assumption is correct. I had a wallowing feel in the rear which to me felt like having new mud tires kinda squishy shifty feel at higher speeds. So i am guessing if i switch out the factory goodyears it will go away. I played with tire pressure and didnt change much. 70-80psi
My gold truck did not have that feel at all and it has toyo at2 on 18s at 70psi. No big deal and i got used to it. Probably order some timbren bumps also to help keep more weight on the front axle and for extra support. I am not touching the overloads but never hurts to have a little more. This trailer has some heavy hitch weight it feels truly around that 2800-2900lb range

IMG_0160.jpeg
 

DLC

Well-Known Member
Joined
Jan 18, 2013
Messages
9,931
Reaction score
14,503
@DoughBallin14

You Sir have Talent! Excellent Craftsmanship With Amazing Results!

Trailer looks better than new!

you were kicking ass on that bad boy for 5 or 6 months! Had a plan and stuck with it all in your spare time.


Congratulations !

Job well Done - Ok to this point!
I’m sure the “to do list “ has more on it - It never ends!

keep us posted, Please!

I just re read this thread, and I’m exhausted just thinking about all the work & planning you both did.
 

DoughBallin14

Well-Known Member
Joined
Apr 22, 2014
Messages
973
Reaction score
1,157
@DoughBallin14

You Sir have Talent! Excellent Craftsmanship With Amazing Results!

Trailer looks better than new!

you were kicking ass on that bad boy for 5 or 6 months! Had a plan and stuck with it all in your spare time.


Congratulations !

Job well Done - Ok to this point!
I’m sure the “to do list “ has more on it - It never ends!

keep us posted, Please!

I just re read this thread, and I’m exhausted just thinking about all the work & planning you both did.
Thank you for the kind words and motivation. Its honestly been pretty fun to see and do. I know the wife hates me taking up the weekends on it in between haha. Glad i could give you some reading material!
 
  • Like
Reactions: DLC

trophybug19

Well-Known Member
Joined
Apr 21, 2008
Messages
114
Reaction score
71
What paint are you using on the walls? And what type of prep do you do to insure it sticks? Last one are you rolling or do you spray?
 

DoughBallin14

Well-Known Member
Joined
Apr 22, 2014
Messages
973
Reaction score
1,157
What paint are you using on the walls? And what type of prep do you do to insure it sticks? Last one are you rolling or do you spray?
Walls were lightly scuffed and wiped down with a water and iso alcohol 70/30 ish mix. I grabbed i think it was sherwin williams exterior trim eggshell white no tinting for easy touch ups and i sprayed many light coats with a wagner airless sprayer. So far its been durable and cleans easy.
Cabinets i have done in 3 different trailers 3 different paints (regular paint, chalk paint , this spraypaint) and so far this has been the best and most durable but more limited to colors. I used a satin spray rattle can paint.
 

DoughBallin14

Well-Known Member
Joined
Apr 22, 2014
Messages
973
Reaction score
1,157
Update: Sometimes the small things make a good difference!

1) Replaced my little access door for my landing gear controls. Mainly it was brittle yellow and old, plus the door fell right off when i went to get it from storage!

2) Also got my side spot lights replaced, was near fontana today and stopped by LeisureRV to pic up these all led 8inch round replacements and grabbed some of the angled bezels to focus the light down more. Next ill do the loading ramp door ones. The old ones had cracked lenses and a burnt out incandescent bulbs

3) Swung by a buddies house to weld up a shackle that had a crack in a weld since i have owned it. He grooved out the old welds all the way around and layered it up nice and strong.

Which now brings my next dilemma that we both noticed that i don’t recall seeing before when i replaced all the equalizers and wet bolt, links, and bushings.

So the third axle(back one) is crooked and the equalizer on level ground is slammed forward! Hitting the back of the middle equalizer bracket

Something had to have shifted or settled or all my leafs have flattened out or broken in the rear and are now longer?

Maybe i need to order slightly shorter eye to eye leaf packs and up the weight just because?

Cut off and weld a new back shackle bracket to pull the axle back to equalize the space between?

Also see why the axle is crooked, maybe the centering bolt in the leaf pack broke? Or the perch on the axle ovalled out if the ubolts got loose?

Lots to think about! But we are going to ocotillo tomorrow still for new years


IMG_2344.jpeg
IMG_0336.jpeg
IMG_0337.jpeg
IMG_0358.jpeg
IMG_0359.jpeg
IMG_0361.jpeg
IMG_0363.jpeg
 

DoughBallin14

Well-Known Member
Joined
Apr 22, 2014
Messages
973
Reaction score
1,157
Axle shackle pics. Hard to get a picture of the angle last axle. Last axle is to the right of the pictures. Trailer was level ground and unloaded, no water or toys.


IMG_0333.jpeg
IMG_0334.jpeg
IMG_0335.jpeg
 

DoughBallin14

Well-Known Member
Joined
Apr 22, 2014
Messages
973
Reaction score
1,157
Did you make any sharp turns or go in reverse at an angle prior to stopping for this Pic?
Nope nothing more than turning normal down streets and my storage is pull through so nothing there.
I just went back to look all pictures i had taken and looked for something and about 2 months back in the background i can see the equalizer tipped forward like it is now and the space between the back axle tire and the middle axle tire looks closer than the middle and front axle tire. I need to get some hub center to hub center measurements and see whats up. That should me get started, i guess also measure both sides center pivot bolt across all shackle / equalizer mounts as well.
 

DoughBallin14

Well-Known Member
Joined
Apr 22, 2014
Messages
973
Reaction score
1,157
Not much going on here lately for the trailer. Getting ready to hopefully use it at the desert for presidents weekend!

Had the landing gear motor slowly die and clunk and click on me as i was loading it on the truck so picked up a new drive motor and figured what the heck new gear box also.
I’ll get that installed tomorrow, also noticed the connecting bar was running down hill to the other leg, looks like one leg was replaced before and it was mounted wrong and not between the bolt stops, got that situated. Kinda always sounded like the link bar got bound up and clunked a lot. Now its straight and all my leg gears are greased ready to go.

Also wife wanted me to finally build the shelf under the mission tv.
So here you go and gave it a good edge up top so things can slide around but not fall off. A little sanding and gave it the old hibachi torch action, a nice poly seal and we are all set !


IMG_0626.jpeg
IMG_0627.jpeg
IMG_0628.jpeg
IMG_0629.jpeg
 

DoughBallin14

Well-Known Member
Joined
Apr 22, 2014
Messages
973
Reaction score
1,157
Well got my parts installed and the landing gear legs work beautiful again!

Also walked into a nice surprise in the garage when i went to load it up. Looks like the motor crossbar jiggled off then the bed dropped and must have bounced the clips off the drive chain then pulled the 4 screws out of the bed. So fixed that and added screws everywhere they had a hole. Idk why they dont put screws in every available hole. Eitherway got it remounted and drilled a hole on the motor cross bar to pit a lock bolt in it like it should be. All good and loaded for next weekend.

IMG_0633.jpeg
IMG_0634.jpeg
IMG_0636.jpeg
IMG_0638.jpeg
IMG_0635.jpeg
IMG_0639.jpeg
IMG_0640.jpeg
IMG_0641.jpeg
 

DoughBallin14

Well-Known Member
Joined
Apr 22, 2014
Messages
973
Reaction score
1,157
The party continues!!!

Last sunday got the rig cleaned up, gassed up, loaded up. Headed back to storage got about 3/4s of the way lifted off the truck and bam! Crunch crunch! the passenger side landing gear leg that i just moved up in my last post to align the cross bar with the driver side leg which also has the single motor and gear box i just replaced.

Soooo needless to say i just about sauced my shorts when that thing let go ha buy luckily it locks out and held in place, i was able to get it lifted enough to get off the truck with one leg, although it was leaning good it was stable for a few days. Also found the other drive side leg mounting hole for the crossbar was just about ready to crack and snap off anyways!

Got two new landing gear legs which helps me replace the other one i bent slightly over summer last year which caused it to not fully retract also.

Figured if i am doing this i might as well upgrade and get another motor, gearbox, and switch, now its a dual motor set up with one per leg! So nice to have double the lifting power and speed to lift the goose neck off the ball of the truck now. Cleaned out that china wax grease for the gears in each leg and gearbox and packed some of my favorite maxima grease in there to help keep her smooth.
Also chose to add an additional cheap fused switch for now. Wasnt sure if using the existing switch for both motors would be to high of amp draw for the wire size and single 30 amp blade fuse when being ran under full load together, Just needed to get it working so i could still make our desert trip happen Friday.

But the wiring kit on the switch was to short to be able to mount it next to the existing switch and i was out of 10g wire to extend it.
I would ultimately like to use this 3 switch panel from gamma so i can do both legs with one button or individual but it was like 7-10 day delivery time.
For now i moved the existing switch next to the new one and we are good to go boys! Another crisis fixed and very happy i can now control each leg individually to help on some of the slightly uneven ground at times.

IMG_0756.jpeg
IMG_0762.jpeg
IMG_0755.jpeg
IMG_0754.jpeg
IMG_0757.jpeg
IMG_0758.jpeg
IMG_0759.jpeg
IMG_0760.jpeg
IMG_0761.jpeg
IMG_0763.png
 

DoughBallin14

Well-Known Member
Joined
Apr 22, 2014
Messages
973
Reaction score
1,157
Next chapter in the book here.

So a few post back i had mention my third rear axle was not aligned with the front 2. I could see it was crooked just walking around it. Also the excess wear on the inside of my new tires.

Finally took measurements and all my hanger bracket mount holes for the leafs and equalizers are dead nutz the same on both sides so thats good, next up hub center to hub center to hub center, this is where it gets bad. There was a 5/8 difference measuring the center axle hub to the rear axle hub center. Mostly on the passenger side, the driver side was like 3/8. Basically showed that the passenger side kicked forward and the driver was shifted backwards slightly.

I go to look to see if maybe when the axles were flipped years ago they used a slotted perch so it could be adjusted some and my axle shifted some how. Well not the case. No room for adjustment at all.
Good news it i think the culprit has been found!!!!
Found the passenger side center axle leaf pack had a broke spring in the 4 pack which was causing it to flatten out and push up on the equalizer pulling the rear axle forward. Also on the driver side rear axle leaf pack i found the center bolt broken in the middle and had rusted away enough to let it shift slightly 🤦🏽‍♂️.

Looks like ill be ordering 6 new leaf packs from my boys at rp carriages https://needatrailerpart.com/

Was crunched under the trailer so didnt feel like getting my phone for pics.

Continued next!!!
 
Last edited:

DoughBallin14

Well-Known Member
Joined
Apr 22, 2014
Messages
973
Reaction score
1,157
Not to make the last post longer but also while taking the axles leafs apart to investigate, i saw 2 bent leaf hanger mounts in different spots one was bent inward on the rear axle and another on the front middle equalizer mount. So now that gets my mind spinning and all i think about is those pictures of people turning or driving and the hangar mounts break or fold in on themselves!

Well i can rest easy now! I think i made a good peace of mind solution that is tension adjustable as well. Basically made a Z pattern brace with some 3/4 .120 tubing i had and welded some heim ends and mounting brackets. Also bent back the two mounts straight and checked for cracks in the welds. All good. So check it out and let me know what you think.
I used the existing holes in my hanger brackets to mount the heim brackets. Each axle is cross brace supported to the next axle. I feel like it will help haha


IMG_0895.jpeg
IMG_0896.jpeg
IMG_0897.jpeg
IMG_0899.jpeg
IMG_0900.jpeg
IMG_0904.jpeg
IMG_0905.jpeg
IMG_0906.jpeg
IMG_0901.jpeg
 

DoughBallin14

Well-Known Member
Joined
Apr 22, 2014
Messages
973
Reaction score
1,157
Got my new fridge fan installed today as well. Getting ready for summer and i feel like it needed the ventilation at the river. So might have gone over board but oh well.
Amazon special 8 inch spal fan and a switch installed next to my fridge switches so i can control when i need it in those over 100 degree days when the fridge struggles.

I can say you can really feel the air flowing out of the top vent and feel it sucking in from the bottom.
I was never really a fan of the little fan kits they sell which i know they do work but i think this one fan will do way more.

IMG_0909.jpeg
IMG_0914.jpeg
IMG_0910.jpeg
IMG_0911.jpeg
IMG_0912.jpeg
IMG_0913.jpeg
 

DLC

Well-Known Member
Joined
Jan 18, 2013
Messages
9,931
Reaction score
14,503
@BPRACING

you should do the fridge fan!

maybe add one to the bath fart fan also….

lol
 

DLC

Well-Known Member
Joined
Jan 18, 2013
Messages
9,931
Reaction score
14,503
Got my new fridge fan installed today as well. Getting ready for summer and i feel like it needed the ventilation at the river. So might have gone over board but oh well.
Amazon special 8 inch spal fan and a switch installed next to my fridge switches so i can control when i need it in those over 100 degree days when the fridge struggles.

I can say you can really feel the air flowing out of the top vent and feel it sucking in from the bottom.
I was never really a fan of the little fan kits they sell which i know they do work but i think this one fan will do way more.

View attachment 1356154 View attachment 1356155 View attachment 1356156 View attachment 1356157 View attachment 1356158 View attachment 1356159
Great Idea on the fan !!

Do you have a link for it?
 
Top