RVR2SNO
Well-Known Member
- Joined
- May 16, 2012
- Messages
- 1,132
- Reaction score
- 2,942
RDPers...
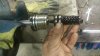
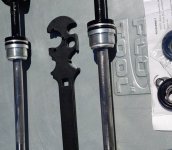
My starboard trim cylinder/ram is seeping. I have a couple spots on my driveway. I suspect an internal seal of the cylinder/trim ram gave out. In looking at the Bravo 1 manual, there are directions for taking it apart and putting it together. Also, I see there are seal kits as well as overhaul kits available.
My questions is how difficult is it to do this repair? Has anyone done it? Seal kit vs. overhaul kit? I'm pretty handy and do all the maintenance on the boat myself, and would rather try to do it than take it to shop where they'll charge me $85/hr labor.
I appreciate any advice?
Thank you!